Barbarian Charge Revitalization in Diablo 4 Season 3: Patch Notes Highlights

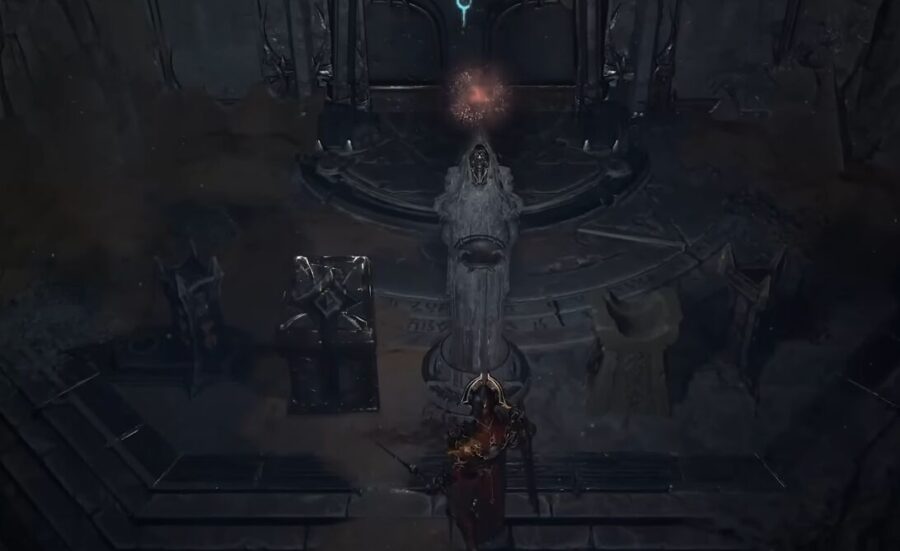
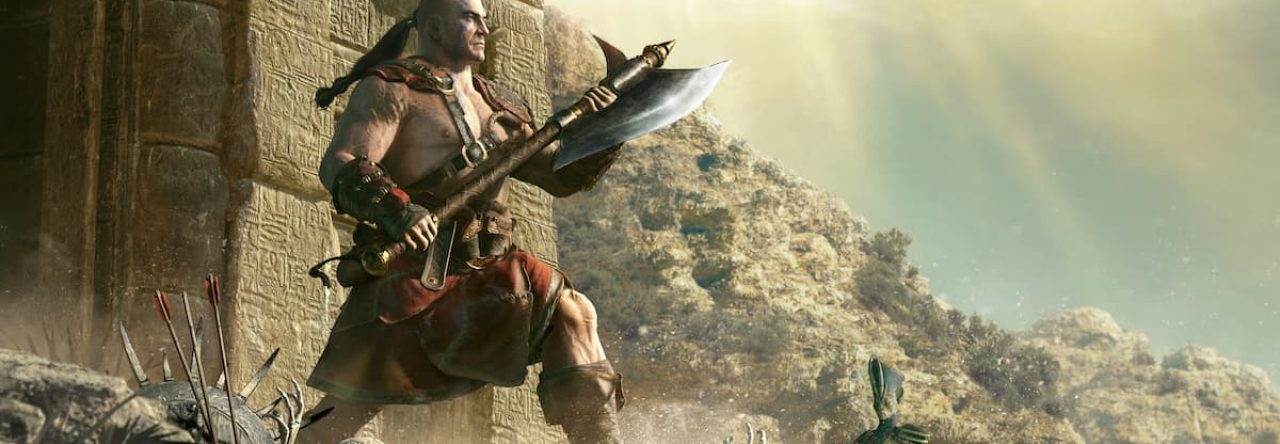
As anticipation builds for Diablo 4 Season 3, Barbarians are in for an exciting prospect as Charge takes center stage with significant improvements. Adam’s revelation during the Season 3 campfire chat hints at an 8x bonus right from the start, coupled with item adjustments and buffs to key passives. The question arises: if Charge became a potent force capable of swiftly dispatching foes, would it pique your interest in playing? Let’s explore the noteworthy changes in the patch notes that promise to transform Charge into a formidable skill.

Charge Overhaul
The fundamental transformation of Charge comes with a staggering increase in base damage by 900%, elevating it from 0.25 to an impressive 2.50. Enhanced Charge’s terrain impact damage receives a substantial boost of 150%, escalating from 0.6 to 1.5. Notably, Power Charge undergoes a crucial adjustment as it no longer necessitates a terrain impact to trigger the cooldown reduction for Charge. Instead, charging a boss now actively shaves off 6 seconds from the cooldown. These enhancements aim to make Charge a more impactful and versatile skill in the Barbarian’s arsenal.

Adjustments to Key Passives
Several key passives receive attention in the patch notes, with the goal of refining Barbarian gameplay and encouraging diverse skill selections.

1, Marshal Glyph:
The Marshal Glyph now stands out by reducing the cooldown of every non-Shout skill by a significant 4 seconds. This alteration shifts the focus from decreasing Shout skill cooldowns to enhancing the overall efficiency of Barbarian abilities.

2, Veteran Brawler’s Offensive Aspect:
A recalibration in the bonus damage per stack is implemented, reducing it from 15%–20% to a more balanced 6%–8%. The maximum bonus damage is also adjusted, ranging from 225%–300% to a more moderate 30%–40%. This change seeks to balance the offensive aspect of the Barbarian’s playstyle.

3, Paingorger’s Gauntlets – Unique Gloves:
These unique gloves introduce a dynamic element by marking enemies hit with a cast Non–Basic Skill for 3 seconds. When a Basic Skill lands on a marked enemy, the damage is echoed to all marked enemies, resulting in a substantial increase of 100–200%[x]. This modification aims to diversify skill choices and enhance the synergy between Non-Basic and Basic Skills.

4, Aspect of Adaptability – Utility:
This utility aspect introduces resource management dynamics. When cast below 50% Maximum Resource, Basic Skills generate 3 of the Primary Resource per cast. Conversely, when cast at or above 50% Maximum Resource, Basic Skills receive a significant damage boost of 40–80%. This alteration encourages strategic resource utilization based on the Barbarian’s current resource status.

5, Juggernaut’s Aspect – Defensive:
While providing an armor boost of 0.75–1.25, the Juggernaut’s Aspect introduces a trade-off by doubling the cooldown of Evade. This defensive aspect seeks to add complexity to defensive choices, requiring players to weigh the benefits of increased armor against the extended cooldown on Evade.

6, Ring of the Ravenous:
Rend enthusiasts will find the Ring of the Ravenous appealing, as it extends Rend’s duration by 2.0–4.0 seconds. Additionally, damaging enemies with Brawling Skills applies 2 stacks of Rend’s Bleed, creating a dynamic effect that occurs once every 4 seconds per enemy.

Conclusion
As Diablo 4 Season 3 approaches, the revamped Charge, along with adjustments to key passives and unique items, promises an engaging and diversified Barbarian gameplay experience. The patch notes’ focal points on Charge aim to make it a compelling choice for players, potentially reshaping the Barbarian meta in the upcoming season. Are you ready to embrace the revamped Charge and lead your Barbarian to new heights in Season 3?

Hot question: Which site can I buy Diablo 4 gold?

For sure, MMOexp.com is the best choice. You can get the best service & price here.

Iron Ore Scarcity and Lockpick Limitations: Addressing Resource Imbalances

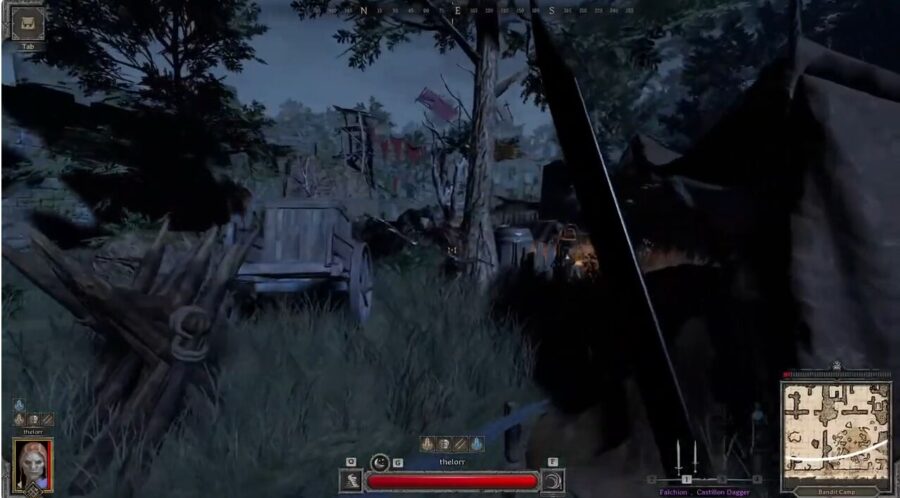
In the intricate world of “Dark and Darker,” resource availability plays a pivotal role in shaping the gameplay experience. One pressing concern revolves around the scarcity of Iron Ore veins, leading players to reassess assumptions about resource distribution and crafting limitations. This analysis dives into the intricacies of Iron Ore scarcity and the constraints on lockpick crafting, proposing potential solutions to restore balance.

Iron Ore Veins: A Rarity Conundrum

The assumption that Iron Ore would bear a resemblance to its real-world counterpart led to an unexpected discovery—misidentification of Ore types. What was initially presumed to be Cobalt turned out to be potentially Iron. The visual cues, particularly the blue tint associated with Cobalt, led to an oversight that only became apparent upon closer inspection. This misinterpretation highlights the need for clarity in distinguishing between Ore types, preventing players from overlooking valuable resources.

A related concern emerges as players observe the scarcity of Iron Ore veins compared to their more exotic counterparts. In a departure from real-world comparisons, where basic resources tend to be abundant, “Dark and Darker” presents a scenario where the lowest tier resource is disproportionately rarer. The call for more numerous Iron Ore nodes on every map gains traction, aiming to align resource availability with player expectations and foster a more balanced economy.

The proposal suggests not only increasing the frequency of Iron Ore nodes but also considering adjustments to crafting requirements, potentially reducing the amount needed to create an ingot. Furthermore, the notion of making Iron Ore obtainable in Goblin Caves adds an intriguing layer, providing an alternative avenue for players to acquire this essential resource.

Lockpick Limitations: Crafting Constraints and Economic Impacts

Another facet of resource management pertains to lockpick crafting limitations. The current system restricts players to crafting only two lockpicks every 30 minutes. While this restriction aligns with the approach taken for magic items, it diverges from the treatment of other essential consumables, such as potions and campfires, which are not subject to crafting limitations.

The proposal advocates for a shift in the treatment of lockpicks, categorizing them alongside other consumables that are not bound by crafting restrictions imposed by merchant restocking. The rationale behind this suggestion lies in the belief that, as long as players possess the necessary materials, crafting lockpicks should be unrestricted, allowing them to create as many as needed.

Economic Implications: Lockpick Prices and Market Dynamics

The scarcity of Iron Ore and crafting limitations on lockpicks have contributed to a notable surge in lockpick prices. In particular, the demand for lockpicks has increased due to more players actively using them. However, the supply has not kept pace, resulting in a significant price hike. Lockpick prices have reached a point where the cost of crafting them outweighs the potential gains from opening chests, especially in scenarios outside of Hardcore (HR) mode.

This economic shift has implications for players, particularly in HR where chest rewards may not cover lockpick costs. The proposal contends that lockpicks should be considered a standard loadout item, urging a reevaluation of their pricing structure. A recalibration of lockpick prices, informed by chest expected value and potential risks, could restore equilibrium and encourage wider adoption of this essential tool.

In conclusion, the call for addressing Iron Ore scarcity and reassessing lockpick crafting limitations stems from a desire to create a more balanced and engaging gameplay experience. By reevaluating resource distribution, crafting restrictions, and economic dynamics(include Dark and Darker gold, items market), “Dark and Darker” can better align with player expectations and foster a more vibrant and equitable in-game ecosystem.

Exploring the Enigmatic World of Throne and Liberty

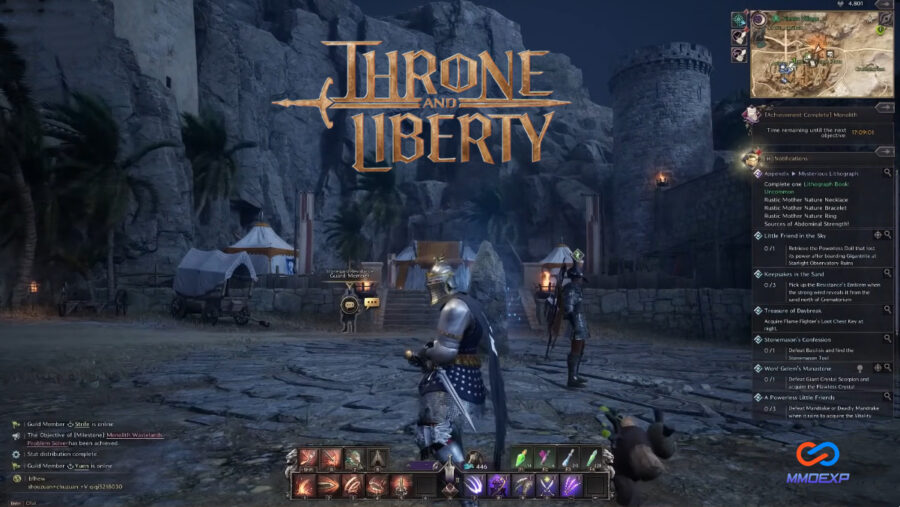
In the vast landscape of online gaming, Throne and Liberty stands out as a promising MMORPG that captivates players with its intricate storyline, stunning graphics, and challenging quests. The game takes players on a journey through a fantastical realm filled with mystery and danger, where every step brings them closer to unraveling the secrets of this enigmatic world. This article delves into a recent gameplay experience, highlighting the excitement, challenges, and visual splendor that Throne and Liberty offer to its players.

The Unveiling of Secrets:

The narrative begins with the player navigating through a foggy and perilous environment, guided only by a mini-map that hints at hidden wonders. The protagonist stumbles upon a memory fragment, triggering a quest to track down a character named Ezekiel. As the player advances, statues and architectural marvels capture the eye, showcasing the attention to detail and high-quality design that Throne and Liberty promises.

A Guardian’s Pledge:

The journey takes an intriguing turn as the player encounters a mysterious door. Equipped with the Guardian Pledge, a key to the unknown, the protagonist steps forward into uncharted territory. The unfolding events are accompanied by breathtaking visuals, and the character’s glowing appearance exemplifies the game’s commitment to delivering a visually immersive experience.

Challenges and Mysteries:

As the player progresses, they face challenges within the game’s intricate architecture. The environment closes in, creating an atmosphere of suspense and mystery. A dialogue with a character named Carl Ghost adds depth to the unfolding story, urging the player to activate a memory sign and delve further into the secrets of the game.

Navigating Through the Unknown:

The gameplay takes an interesting twist as the player grapples with the task of reaching a higher platform. This segment showcases the player’s creativity and problem-solving skills, as they strategize on the fly. The challenges are not only physical but also mental, requiring the player to examine floating thoughts and activate devices to progress.

Community Interaction:

During the gameplay, the player interacts with the game’s community, seeking advice on the best server for English-speaking players. The mention of the Kazar server and the camaraderie within the player base highlight the importance of community engagement in enhancing the overall gaming experience.

Ping Issues and Gameplay Challenges:

As the player encounters obstacles, including ping-related problems and platforming challenges, resilience and determination shine through. The article captures the live-streaming experience, including moments of confusion, frustration, and eventual triumph over in-game hurdles.

Visual Splendor and Cutscenes:

Throne and Liberty’s visual appeal is further accentuated during cutscenes, where the graphics reach a pinnacle of excellence. The integration of cutscenes into the gameplay adds a cinematic dimension, immersing players deeper into the unfolding story.

Combat Dynamics and Skill Usage:

The gameplay’s intensity rises as combat scenarios unfold. The protagonist faces adversaries, showcasing the combat dynamics of Throne and Liberty. However, technical issues hinder the seamless use of skills, adding an element of unpredictability to the battles.

Artifacts and Unveiling the Next Chapter:

The discovery of energy-infused artifacts and the subsequent cutscene mark a turning point in the narrative. The player is drawn into a riveting battle against a formidable foe, where strategic thinking and quick reflexes are crucial.

Conclusion:

Throne and Liberty presents players with a gaming experience that combines visual excellence, challenging quests, and an engaging narrative. The exploration of mysterious realms, the camaraderie within the community, and the thrill of overcoming obstacles contribute to the game’s allure. As Throne and Liberty continue to evolve, players can anticipate more adventures, mysteries, and breathtaking moments in this captivating virtual world.

Buy Throne and Liberty Lucent and Items at the best prices on MMOEXP. Therefore, it’s 100% safe to buy TL Lucent and Items from mmoexp.com.

The Best Melee Gear Guide in OSRS

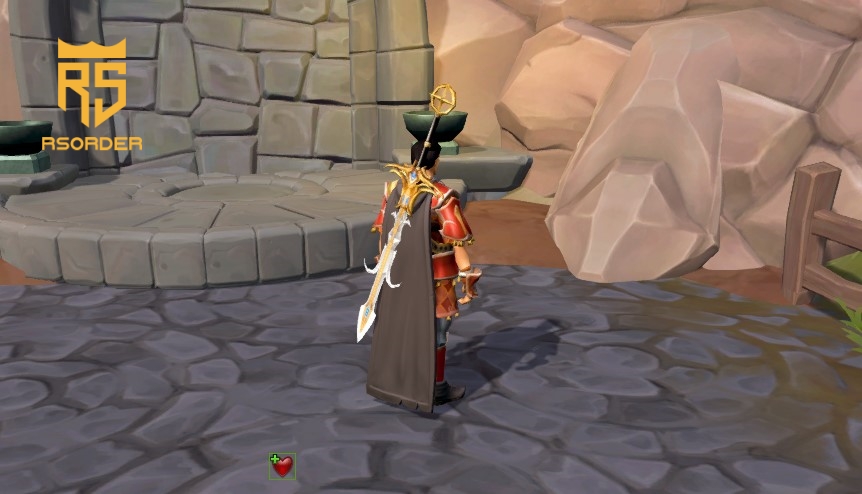
Mastering melee combat in Old School RuneScape (OSRS) is vital for overcoming tough adversaries, completing quests, and dominating player-versus-player confrontations. To excel in combat, it’s crucial to equip yourself with the game’s finest melee gear. This comprehensive guide will assist you in identifying top-tier melee gear to maximize combat efficiency, survivability, and unlock new opportunities.

Selecting the appropriate melee gear is pivotal for enhancing your combat effectiveness. Whether you’re confronting dragons, engaging in PvP battles, or challenging powerful boss monsters, high-quality armor and weapons can significantly impact your performance. These gears not only augment your offensive and defensive capabilities but also provide valuable stat bonuses that can tip the scales of battle in your favor.

In OSRS, melee gear isn’t solely about sheer power; precision and speed are equally paramount. Certain weapons, like the Abyssal Whip, offer incredible attack speed, enabling you to strike enemies rapidly and accurately. These weapons are essential for maximizing your damage output and swiftly dispatching foes.

While offense is crucial, defense plays a vital role in ensuring your survival. The best melee gear often boasts high defensive stats that diminish the damage you receive from enemy attacks. This becomes especially valuable when facing formidable opponents, as it allows you to engage in prolonged battles without depleting your health and resources.

Investing in top-tier melee gear can also prove cost-effective. Superior armor and weapons are more durable and require fewer repairs, saving you valuable OSRS gold. You can then allocate these savings towards other aspects of your character’s development, such as training other combat skills or acquiring valuable items. Alternatively, you can choose to buy RuneScape gold from RSOrder.

Equipping the best melee gear unlocks new opportunities for your character. As your combat capabilities improve, you gain access to higher-level content, including challenging bosses, elite quests, and formidable player-versus-environment encounters. These activities often yield valuable rewards and open doors to new adventures that would otherwise remain inaccessible with inferior gear.

For players focused on player-versus-player combat, the best melee gear is indispensable. It not only enhances your combat performance but also grants you an advantage over opponents who may have not invested as heavily in their gear. With the right equipment, you can ascend to the top ranks of the OSRS PvP community and earn prestigious rewards for your accomplishments.

Tactical Groundhog Day: Unveiling the Monotony in FC 24 Strategies

Stepping into the realm of EA FC 24, a seasoned player with a Gold 1 track record encounters a puzzling phenomenon — a seemingly homogeneous landscape where opponents employ eerily similar tactics, turning each match into a relentless sweatfest. The initial weekend league presented a decent 12-8 record, but a subsequent shift in matchmaking introduces an unrelenting barrage of formidable opponents, each deploying what appears to be an impervious defensive strategy.

The recurring theme unfolds in attack — a midfield that’s unnaturally deep, creating a suffocating barrier in the center. The player laments the robotic precision with which opponents defend, crowding the middle and orchestrating a press down the wings that involves 2-3 players at all times. The opponents, akin to automatons, exhibit a level of defensive prowess that seems impervious to mistakes and immune to the tactical nuances attempted by our player.

Defensive struggles compound the frustration. The player finds their team lethargic in contrast to the opponents’ proactive and fleet-footed players. The quest to learn improved defensive techniques faces formidable challenges, with victories against the current caliber of opponents remaining elusive. It prompts a query: Is this the new normal in FC 24, or is there a prevailing tactical trend that’s orchestrating this monotony?

Placed in Division 5 post-reset, a noteworthy drop from the previous Division 3 standing, our player grapples with the perplexing sameness in the strategies employed by every adversary. It echoes the sentiment of facing a copy-paste strategy that defies the diversity and unpredictability inherent in virtual football.

The question of tactics looms large. What strategy is so pervasive that it has become a ubiquitous template, blurring the lines between opponents and rendering matches eerily repetitive? The player finds it difficult to reconcile this abrupt shift in difficulty, noting that just a week ago, the challenges were not as formidable.

As EA FC 24 unfolds, the homogeneity in tactics raises questions about the evolving meta and the collective gravitation toward a particular style of play. Are players adhering to a tried-and-tested formula, resulting in a convergence of strategies that transcend individual playstyles? The player’s observation of a midfield congestion and a relentless press on the wings hints at a tactical symmetry that extends beyond mere coincidence.

Navigating this tactical Groundhog Day becomes a personal quest for the player. The desire to adapt and overcome challenges is met with a realization that the opponent pool operates within a narrow spectrum of strategic choices. As the player grapples with the defensive puzzle and strives to inject variety into their own play, the monotony in facing carbon-copy strategies poses a unique set of challenges.

In conclusion, the player’s experience in FC 24 raises intriguing questions about the prevailing tactics and their impact on the virtual football landscape. The journey from Gold 1 to a Div 5 standing in the reset brings forth challenges that extend beyond individual skill levels, pointing towards a potential shift in the overarching meta. As the player seeks to break free from the shackles of repetitive strategies, the evolving nature of EA FC 24 promises ongoing discoveries and tactical adaptations, making every match a dynamic puzzle waiting to be solved.

Still struggling with a lack of FC 24 Coins? Follow MMOexp.com to get the best tips on how to earn and buy FC 24 Coins and enjoy your game.

Cultivating a Positive Loot Experience: A Plea for Chill in Dungeon Groups

Navigating the dungeon experience in World of Warcraft Classic Season of Discovery can be a rollercoaster, especially when it comes to loot distribution. As a tank who frequently organizes dungeon groups, the journey has been both expedient and tumultuous. This reflection delves into the challenges faced with loot-related conflicts and extends an appeal for a more relaxed approach to enhance the overall dungeon experience.

Smooth Operations and Frequent Dungeon Runs
Efficiency is the key to success, and spamming dungeons has proven to be a quick and effective strategy. The elimination of travel time and the streamlined loot tables significantly increases the likelihood of obtaining coveted items in subsequent runs. The process becomes a well-oiled machine, allowing for seamless dungeon runs and loot acquisition. However, the harmony is disrupted when loot-related tensions rear their head, transforming what should be a swift and enjoyable experience into a tumultuous affair.

Hissy-Fits and Conditional Joining
One recurring disruption involves players throwing hissy-fits when they lose the roll on an item. The fallout from such incidents not only sours the atmosphere but also disrupts the flow of dungeon runs. Additionally, some individuals attempt to impose conditions for joining a group, such as demanding a specific item. This practice, while understandable to an extent, hinders the collaborative spirit of dungeon runs and can lead to a challenging recruitment process.

The Unfortunate Fallout
When a player succumbs to loot-related frustration and decides to leave the group, it initiates an unwarranted ripple effect. The need for a replacement arises, introducing potential delays and setbacks. In some cases, a complete overhaul of the group might be required, further impeding the momentum of the dungeon spamming strategy. This unfortunate fallout detracts from the overall efficiency and enjoyment of the experience.

An Appeal for Chill
The heart of the matter lies in an appeal for a more relaxed and understanding attitude regarding loot. Constant clashes over items create a toxic environment that diminishes the enjoyment of the game for everyone involved. Loot is a part of the World of Warcraft experience, but it should not overshadow the camaraderie and collaborative spirit that make dungeon runs memorable.

Optimizing Loot Acquisition
By fostering a more relaxed approach, dungeon groups have the potential to optimize loot acquisition. A positive atmosphere encourages players to join groups not just for the loot but for the shared experience of conquering dungeons together. It allows for smoother operations, quicker runs, and a more enjoyable journey through the vast landscapes of Azeroth.

Conclusion
In the dynamic realm of World of Warcraft Classic Season of Discovery, the call for a more chilled-out approach to loot is paramount. As a tank who orchestrates dungeon groups, the desire for a positive and collaborative loot experience is not just a personal preference but a plea for a better collective gaming experience. It is a reminder that, at its core, the game is about shared adventures, defeating foes, and emerging victorious together—loot is merely a bonus on this epic journey.

Want to get stronger in Season of Discovery? Want to improve your gear and boost your DPS? You need a lot of WoW Classic SoD Gold, come to MMOexp.com, we can help you. We also offer WOW Classic Gold service, thank you.

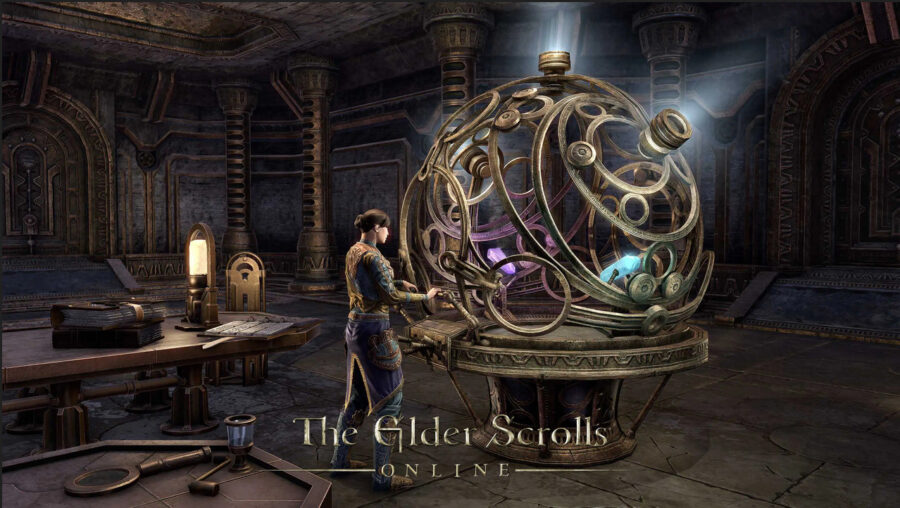
The Power of Transmute Crystals in The Elder Scrolls Online

In the vast and immersive world of The Elder Scrolls Online (ESO), players constantly seek ways to optimize their characters and equipment. One valuable and often sought-after resource in ESO is the transmute crystal, a key component for modifying and enhancing gear. In this article, we’ll explore the significance of transmuting crystals, their utility, and an ingenious method to turn them into a lucrative gold-making strategy.

Understanding Transmute Crystals:

Transmute crystals play a pivotal role in ESO as they enable players to transmute and reconstruct their gear. In simpler terms, transmuting allows you to change the trait of an item or create an entirely new one. This process is carried out at a transmute station, where players can spend transmute crystals to modify their equipment. For most ESO players, transmute crystals are highly desirable, and many willingly engage in various in-game activities to earn them, or even buy them at a high price with ESO gold.

However, there exists a unique perspective for players who find themselves with an excess of transmute crystals and no immediate need for them. This article caters to those individuals who may be wondering what to do with their surplus transmute crystals.

Turning Transmute Crystals into Gold:

For players who have accumulated an abundance of transmute crystals and wish to convert them into gold, there is a clever and straightforward process. The key lies in the creation and deconstruction of weapons with the desired traits.

Research the Nernhoned Trait: Ensure that you have researched the Nernhoned trait for a weapon of your choice. This trait is essential for the upcoming crafting process.

Craft a Weapon Without a Trait: Create a weapon of your choice but omit any trait during the crafting process.

Retransmute to Nernhoned: Head to a transmute station, which can be found in Clockwork City, Guild Halls, or purchased with writ vouchers. Retransmute the weapon you crafted to the desired Nernhoned trait. This will cost you 50 transmute crystals.

Deconstruct the Weapon: Once you have the Nernhoned weapon, proceed to deconstruct it at the appropriate crafting station. This action yields potent Nerd Crux, the most expensive trait stone in the game.

Sell the Nerd Crux: If you are part of a trading guild, you can sell the obtained Nerd Crux on your guild trader for a substantial amount of gold. Alternatively, you can try selling it in zone chat or keep it for personal use.

Benefits of the Strategy:

Profitable Gold-Making: By using this method, players can turn surplus transmute crystals into a valuable and sellable resource, thereby increasing their in-game Elder Scrolls Online gold wealth.

Nernhoned Trait Availability: The strategy also ensures a steady supply of Nerd Crux, a rare and desirable trait stone for crafting. This can be used personally or sold for a significant profit.

Efficient Use of Resources: For players with an excess of transmute crystals and no immediate need for trait changes, this method provides an efficient and lucrative way to utilize those resources.

Conclusion:

The Elder Scrolls Online continually offers players new ways to explore, create, and optimize their characters. Understanding the various elements of the game, such as transmuting crystals, opens up opportunities for creative and resourceful strategies. By utilizing surplus transmute crystals to generate gold, players can not only increase their wealth but also contribute to the thriving economy within the Elder Scrolls Online universe. So, whether you’re a seasoned adventurer or a newcomer to Tamriel, consider the power that transmutes crystals hold and how you can harness them for both personal and financial gain. Cheers to your endeavors in the ever-expansive world of ESO!

Classes in CABAL: Return of Action

Warrior
Attributes: Strength, High HP, Heavy Armor
Role: Melee Tank and Damage Dealer

The ethos of the Warrior centers around the belief that strength reigns supreme on the battlefield. This melee juggernaut concentrates on honing physical might, clad in formidable heavy armor to crush adversaries. Armed with the imposing Greatsword, Warriors deliver devastating blows, establishing themselves as formidable melee combatants.

Their primary attribute is Strength, ensuring their attacks pack a resounding punch. The combination of high HP and heavy armor renders them unyielding, ideally suited for tanking roles while inflicting significant melee damage.

Blader
Attributes: Dexterity, Strength, Light Armor
Role: Melee Damage Dealer

Masters of martial arts, Bladers distinguish themselves with a unique dual-blade combat style that swiftly renders foes helpless. These agile warriors prioritize speed and agility over raw strength, donning light armor for optimal maneuverability.

Armed with dual blades, their expertise allows them to strike with unparalleled swiftness, establishing them as high-damage dealers. Bladers thrive on a combination of Dexterity and Strength, maximizing their ability to deliver rapid and powerful melee strikes.

Wizard
Attributes: Intelligence, Light Armor
Role: Long-Range Spellcaster

The Wizard epitomizes the archetype of a long-range spellcaster, relying on the arcane to assail foes and shield themselves. Cloaked in light armor for nimble movements, Wizards master both single-target and area-of-effect spells, making them potent ranged attackers.

Their primary attribute, Intelligence, significantly enhances their magical prowess, ensuring that their destructive spells hit with maximum impact. This makes them the go-to choice for those who prefer annihilating foes from a safe distance.

Force Archer
Attributes: Dexterity, Intelligence, Medium Armor
Role: Hybrid Ranged Damage Dealer and Support

A distinct branch of the Wizard class, Force Archers wield the force of magic for precise, long-range single-target damage. These hybrid ranged combatants strike a balance between physical and magical damage, adept at supporting allies while delivering pinpoint strikes from afar.

Cloaked in medium armor, Force Archers rely on both Intelligence and Dexterity attributes. Their versatility positions them as valuable assets on the battlefield, capable of adapting to various roles.

Force Shielder
Attributes: Balanced
Role: Tank and Support

Prioritizing defense above all else, Force Shielders don heavy armor and utilize their mastery of force to become impregnable to damage. Their specialization lies in crafting potent Astral Shields, safeguarding themselves and allies on the front lines.

What sets them apart is their need for a balance between Strength, Intelligence, and Dexterity attributes, making them versatile and formidable defenders capable of withstanding formidable assaults.

Force Blader
Attributes: Strength, Dexterity, Medium Armor
Role: Melee Damage Dealer with Magic Abilities

Force Bladers master both blade and magic, seamlessly blending both disciplines to strike deep into enemy ranks. Their focus on speed and precision allows them to navigate obstacles effortlessly. Armed with Katanas and sharp Blades, they wear medium armor, excelling in agility and damage output.

The pivotal attributes of Strength and Dexterity enable them to be considered master swordsmen capable of unleashing both physical and magical devastation.

Gladiator
Attributes: Strength, Heavy Armor
Role: Melee Damage Dealer with Ranged Capabilities

Gladiators are powerful melee fighters, harnessing the Rage resource to unleash devastating close and long-range damage. As their frenzy grows with skill usage, they excel at dealing area-of-effect damage.

Armed with the unique Chakram and donned in heavy armor, Gladiators exhibit versatility and resilience on the battlefield. Their primary focus on Strength empowers them to deliver heavy blows and maintain their fury.

Force Gunner
Attributes: Intelligence, Dexterity
Role: Long-Range Sniper with High Critical Hits

Specializing in a unique force-driven battle style, Force Gunners excel in long-ranged sniping skills and potent area-of-effect damage. Prioritizing higher attack speeds and critical hits, they seamlessly weave both physical and magical attacks to annihilate enemies from a distance.

Cloaked in medium armor, Force Gunners depend on both Intelligence and Dexterity attributes for their effectiveness, making them formidable ranged combatants.

Which Classes are your favourites, and who do you think gets the Classes for Cabal Mobile gems faster?

Top EA FC 24 Career Mode Teams: Most Entertaining Campaigns

EA FC 24 has elevated its gaming experience, focusing on realism and introducing new elements like player Evolutions, PlayStyles, and enhanced features in both Ultimate Team and Career Mode. Career Mode enthusiasts may find it challenging to choose the perfect team from the plethora of options available. Fortunately, we’ve compiled a list of the most enjoyable teams to manage in EA FC 24 Career Mode, catering to various playstyles.

Manchester City:
Managing Manchester City in EA FC 24 Career Mode guarantees an exhilarating experience. With a top-tier squad, a generous budget, and the opportunity to dominate both domestically and in European competitions, the fun factor is unmatched.

Parma Calcio 1913:
Revive the glory of a former European giant by taking charge of Parma Calcio 1913. After financial hardships led them to the lower leagues, a strategic approach can propel them back to the top, where they once competed for European trophies.

AFC Ajax:
For managers who prioritize developing young talent, Ajax is an ideal choice. Renowned for producing future superstars, Ajax offers the chance to showcase emerging talents in both the Eredivisie and the Champions League.

Inter Miami CF:
With recent high-profile signings, including Messi, Busquets, and Alba, Inter Miami CF is on the rise. However, there's work to be done to establish them as an MLS powerhouse, making it an exciting challenge for managers.

Al-Nassr FC:
Explore the Saudi Pro League with Al-Nassr FC, a team with a significant budget and the added allure of Cristiano Ronaldo. Shape the squad to fit your style of play and elevate the club's status in the league.

Brighton & Hove Albion F.C.:
Proud managers can take on the challenge of guiding Brighton to new heights after a successful season. Compete domestically and in European competitions with limited resources, relying on top-tier scouting and savvy signings.

A.C. Milan:
A.C. Milan is poised for a resurgence, and managers can capitalize on the opportunity to lead them to new heights after strategic squad improvements.

Real Madrid:
Managing Real Madrid in EA FC 24 Career Mode is a dream scenario, upholding the standard of one of the most successful clubs globally. With a star-studded squad, the pressure is on to maintain the club's legacy.

Toulouse FC:
Similar to Parma's story, Toulouse FC has risen from financial collapse to reclaim their former glory. Manage this storied French club with a passionate fan base and guide them back to success.

RB Leipzig:
Embrace the attacking style of the Bundesliga with RB Leipzig. Overcome the challenge of the club's business model by retaining emerging stars and turning them into a global powerhouse.

Galatasaray S.K.:
Restore Turkish giants Galatasaray to their former glory by leveraging the talents of players like Mauro Icardi, Wilfred Zaha, Hakim Ziyech, and Tanguy Ndombele. Aim for both domestic and European success.

AS Roma:
Immerse yourself in the passion of AS Roma's fanbase and their counter-attacking style. With players like Romelu Lukaku and Paulo Dybala, navigate the Serie A with a limited budget capable of achieving success.

These teams offer diverse challenges and opportunities, ensuring a thoroughly entertaining EA FC 24 Career Mode experience. Where to get more FC 24 news and FC 24 coins? Welcome to MMOexp.com.

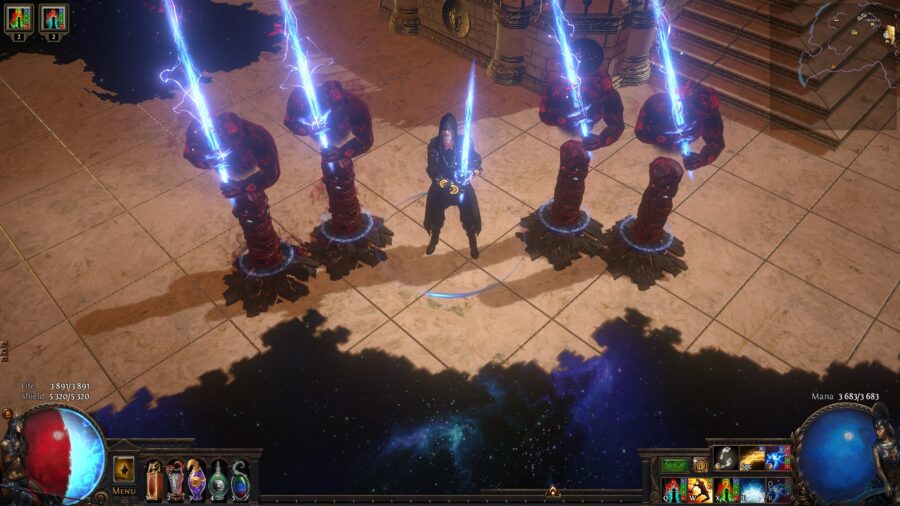
Path of Exile’s Strength and Intelligence Stacking Lowlife Energy Blade Spell Build

In the sprawling world of Path of Exile, building diversity reigns supreme. With a plethora of character customization options and a seemingly endless combination of skills, it can be challenging to determine what truly makes a good build. But there’s one unwritten rule that players often cite: the longer the name of a build, the better it is. Today, we’ll explore a build that surely lives up to this notion – the Strength and Intelligence Stacking Lowlife Energy Blade Spell (Blade Cast on Crit) Inquisitor. This intricate and powerful build is the culmination of extensive experimentation during Path of Exile’s 3.12 “Trial of the Ancestors” league.

The Strength and Intelligence Stacking Lowlife Energy Blade Spell Build, or “Energizer Blade,” as we’ll call it for brevity, is a unique and engaging playstyle that combines a variety of game mechanics to create a formidable character. The build’s core concept revolves around maximizing energy shield while leveraging spellcasting through the “Blade Cast on Crit” mechanic. In this article, we will delve deep into the key mechanics, the skill tree, gear, crafting, and gameplay aspects of this intriguing build.

Key Mechanics of the Energizer Blade Build

The Energizer Blade build harnesses several mechanics, making it a complex yet fascinating playstyle. To understand the build, you must first grasp these core elements:

Energy Shield Stacking: Path of Exile’s Energy Blade skill is central to this build. It grants flat lightning damage based on your maximum energy shield and reduces your total maximum energy shield by half. The build capitalizes on this flat damage to enhance spellcasting capabilities.

Spellcasting with Blade Cast on Crit: The “Blade Cast on Crit” mechanic is the foundation of the build’s damage output. It allows you to cast almost any spell when your character critically hits. This synergizes with the energy shield mechanics, creating a potent combination of offense and defense.

Attribute Stacking: A unique aspect of this build involves stacking both Strength and Intelligence attributes. These attributes impact various aspects of the character’s power, including life, energy shield, and damage. Key items like Ivory Tower and Shaper’s Touch are instrumental in maximizing the benefits of attribute stacking.

Shaper’s Touch and Ivory Tower: Shaper’s Touch gloves play a crucial role in this build, allowing for double-dipping increases to maximum energy shield via attribute stacking. Meanwhile, Ivory Tower converts life to energy shield while reserving life as mana, further enhancing the build’s damage and survivability.

Rathpith Globe: This unique shield is an essential part of the build, providing increased spell damage, which balances the build’s flat damage. The Rathpith Globe becomes the bridge between the flat damage and the spellcasting capabilities, which are amplified through the “Spell Blade” and “Battle Mage” mechanics.

Flesh and Flame Set: The build incorporates the expensive Flesh and Flame set, particularly “Forbidden Flesh” and “Forbidden Flame.” These items are paramount for managing mana and reserving life to energy shield conversion. They also provide increased flask charge gain rate and flask duration.

The Coruscating Elixir: This unique flask is crucial to maintaining 100% flask uptime for the Coruscating Elixir’s energy shield protection, especially against chaos damage.

These are the foundational mechanics behind the Energizer Blade build, and each plays a critical role in enhancing the character’s attributes and spellcasting abilities. By understanding and effectively utilizing these mechanics, players can harness the build’s true potential.

The Skill Tree and Talents of the Energizer Blade

The Energizer Blade builds a skill tree that is complex and revolves around key nodes and clusters that boost attributes, energy shields, spell damage, and critical strike chance. Let’s explore the skill tree’s structure and some of its critical components:

Attribute Stacking: The build’s skill tree encompasses Strength and Intelligence nodes strategically placed to maximize the scaling of attributes. This leads to significant gains in life, energy shield, and damage output.

Spellcasting Enhancements: Key nodes like “Spell Blade” and “Battle Mage” are instrumental in applying the massive flat damage from the energy shield to your spells, effectively double-dipping and maximizing spell damage.

Keystones: The build incorporates valuable keystones such as “Iron Will” for additional spell damage scaling, “Sanctuary of Thought” to mitigate mana costs and increase energy shield as a percentage of unreserved life, and “Agnostic” for life regeneration that benefits energy shield.

Ascendancy Choices: The Inquisitor ascendancy is selected for its significant benefits, including “Instruments of Virtue” and “Righteous Providence,” which boost damage, critical strike chance, and spell-casting speed. While “Inevitable Judgement” provides a consistent damage boost, players can explore “Sanctuary of Thought” in mapping scenarios for added defenses.

Gearing and Crafting for the Energizer Blade Build

Proper gear and crafting are pivotal to the success of the Energizer Blade build. Here are some key items and considerations for each gear slot:

Energy Blade (Weapon): You can use any melee weapon for this build. Craft it with a Hollow Fossil to add an Abyssal socket. The Abyssal socket can then be filled with jewels that provide life, energy shield, critical strike multiplier, and possibly reduced mana reservation or corrupted blood immunity.

Crown of Eyes Inward Eye (Helmet): Look for a Crown of Eyes Inward Eye with an “Energy Blades have Increased Attack Speed” enchantment. This enchantment significantly enhances your damage output. Optionally, you can choose a helmet that adds a 90% cost in reservation multiplier for socketed skill gems.

Rathpith Globe (Shield): Ideally, aim for a Rathpith Globe with a mod that converts physical damage taken as fire, cold, or lightning. Avoid the “Fizzy Taken as Chaos” mod unless you have exceptionally high chaos resistance.

Shaper’s Touch (Gloves): Shaper’s Touch gloves are essential to the build, as they grant an increased energy shield based on your attributes. To maximize the effectiveness of these gloves, obtain a pair with the “+1 to Level of Socketed Gems” modifier, which supports your auras.

The Stampede (Boots): The Stampede boots negate the movement speed reduction when using Cyclone, allowing you to maintain a steady pace. You can use Corrupted Insignia base boots for added defenses.

Amulet: An “Eyes of the Great Wolf” amulet is highly recommended. Look for attributes that grant increased attributes and global defenses. This synergizes well with the build’s focus on attribute stacking.

Chest Piece: Choose an Ivory Tower chest piece, preferably with the “+1 to Level of Socketed Gems” modifier. While increased damage is a desirable stat, it’s not mandatory. You can also craft your chest piece to include defensive modifiers through tailoring orbs or Watcher’s Eye mods.

Rare Ring: The build’s rare ring offers flexibility. Ideally, it should have attributes, life, energy shield, strength, intelligence, and resistance. Consider using an Essence of Spite or Essence of Rage to add desired attributes, depending on your requirements.

Belt: Crafting a belt that matches your specific attributes and defensive needs is essential. Start with a fractured base with either strength or intelligence, then craft attributes, life, increased life, and strength as needed. This process can yield a highly customized belt.

Jewels: For rare jewels, seek ones that offer increased life, increased energy shield, global critical strike multiplier, and critical strike multiplier with elemental skills. The right jewels significantly contribute to your damage output.

Optional Nubis Ring: If you plan to use Blazing Salvo or any spell that benefits from a Nubis ring, obtain one. These rings can improve your build’s performance.

A White Socket: If you intend to use spells other than Blazing Salvo, make sure your chest piece has a white socket to accommodate the Awakened GMP support gem. This is essential for maximizing the spell’s effectiveness.

This comprehensive list of gear and crafting recommendations is tailored to help you achieve the full potential of the Energizer Blade build. Keep in mind that crafting these items can be challenging and costly, so consider using MMOexp trade websites to find or buy POE currency that matches your requirements.

Gameplay and Strategy

The Energizer Blade build offers a unique and engaging gameplay experience. Here are some gameplay elements and strategies to consider when using this build:

One-Button Spinning: The primary gameplay revolves around Cyclone, which serves as your primary attack and movement skill. The build combines Cyclone with the Blade Cast on Crit mechanic, allowing you to unleash spells automatically when you critically hit enemies.

Map and Modifier Considerations: While the build can handle a wide range of maps and modifiers, be cautious about those that reduce flask charges gained or flask duration, as they can disrupt your Coruscating Elixir uptime. Ensuring 100% flask uptime is critical for your survival against chaos damage.

Adaptable Spell Choice: The Energizer Blade build offers versatility when it comes to spell selection. While Blazing Salvo is an excellent choice for clearing maps due to its high overlapping damage, you can also switch to other spells like Eye of Winter, Arc, or Fantasmal Ice Spear for boss encounters.

Bossing Capabilities: Despite not being the tankiest build, the Energizer Blade excels at boss fights. The build’s damage output is significant, allowing you to defeat Uber bosses with ease. Players report achieving quick Uber Elder and Uber Cortex kills with this build.

Beware of Flask-Stripping Ghosts: Some map modifiers introduce ghostly enemies that strip your flask charges. These modifiers can be dangerous if encountered in high-risk situations, so exercise caution and consider killing or avoiding such enemies.

Strategy for Coruscating Elixir: Ensure that your Coruscating Elixir is up 100% of the time to protect yourself against chaos damage. Utilize the Coruscating Elixir while mapping and against bosses for added protection.

Overlap for Maximum Damage: If using Blazing Salvo, strive to maximize the number of projectile overlaps, as this significantly increases your damage output. The Nubis ring can further enhance this aspect.

Overall, the Energizer Blade build offers an engaging and powerful gameplay experience, combining spellcasting and melee skills to become a versatile and effective character. While it may not be the tankiest build, it excels at boss encounters and provides an adaptable playstyle that can clear maps with ease.

In Conclusion

The Energizer Blade build, born from the creative and experimental minds of Path of Exile players, demonstrates the fascinating complexity and possibilities within the game. Its unique mechanics, from attribute stacking to spell casting with Blade Cast on Crit, create a powerful and dynamic character that can face formidable challenges with confidence.

While crafting and optimizing gear for the build may require substantial resources, the results are well worth the investment. The Energizer Blade offers an engaging and adaptable playstyle, making it an excellent choice for those who seek both effective mapping and boss-killing capabilities.

The ever-evolving world of Path of Exile is bound to introduce new builds and mechanics, but the Energizer Blade build is a testament to the creativity and ingenuity of the game’s community. Whether you choose to embark on this journey or explore other build options, the world of Wraeclast continues to offer new adventures and challenges for players to conquer.

We hope this article is helpful. For more guidance on Path Of Exile and buying cheap Path of Exile currency services, check out MMOexp.

Page 8 of 10

Powered by WordPress & Theme by Anders Norén