Tag: OSRS gold

OSRS Twisted Buckler Guide: How to Get One of the Best Ranged Shields

In Old School RuneScape (OSRS), optimizing your combat gear is essential for tackling high-level PvM content efficiently. Among the most powerful off-hand items for ranged combat is the Twisted Buckler, a highly sought-after shield known for its exceptional ranged attack bonus and solid defensive stats. Players who specialize in ranged combat often consider the Twisted Buckler a core upgrade for endgame activities.

Whether you’re farming raids, fighting bosses, or preparing for advanced PvM encounters, understanding how to obtain the Twisted Buckler can help you progress faster. In this guide, we’ll break down what makes the Twisted Buckler so valuable, how to obtain it through gameplay, and how many players use OSRS gold to purchase it directly.

What Is the Twisted Buckler?

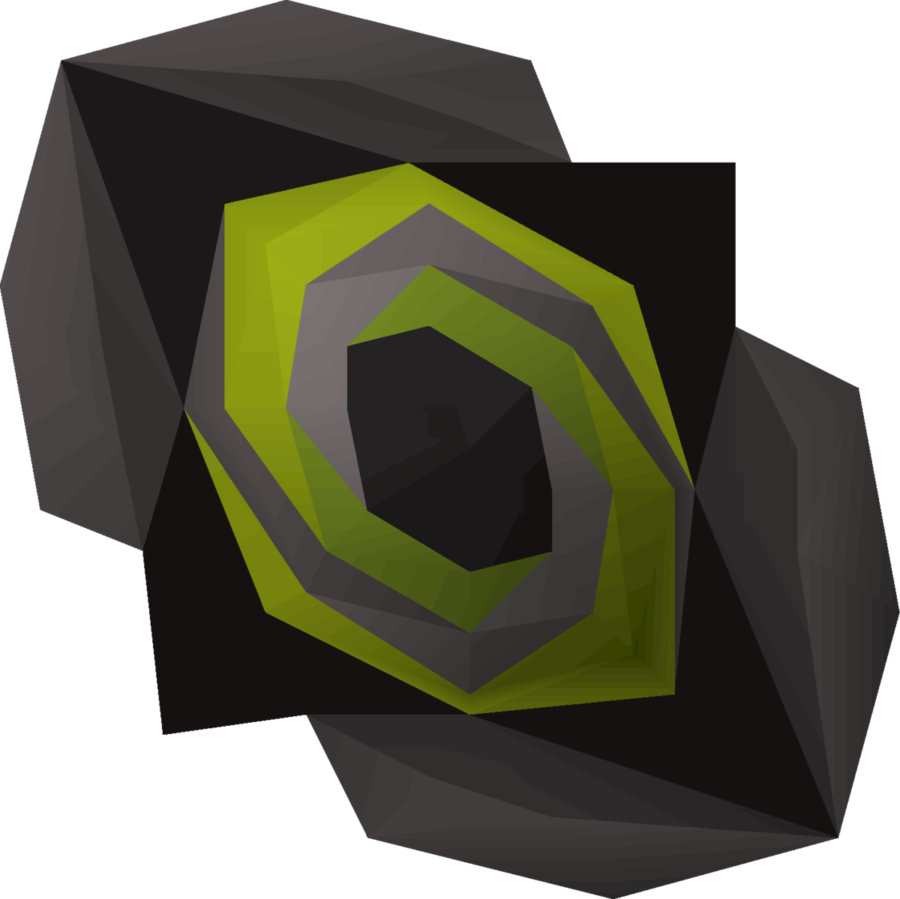
The Twisted Buckler is a high-tier ranged shield introduced with the Chambers of Xeric, the first raid in Old School RuneScape. Unlike most shields that prioritize defensive bonuses, the Twisted Buckler focuses heavily on improving ranged accuracy while still offering respectable defensive stats.

Requirements to Equip the Twisted Buckler

To wield this powerful shield, players must have:

·75 Ranged

·75 Defence

These requirements place the item firmly in the mid-to-late game progression stage, making it a natural upgrade for players entering advanced PvM content.

The Twisted Buckler provides one of the highest Ranged attack bonuses among all shields in OSRS. Because accuracy plays a major role in damage output, especially against bosses with high defense, this shield is extremely valuable for maximizing DPS.

It pairs particularly well with powerful ranged weapons such as:

·Twisted Bow

·Dragon Hunter Crossbow

·Armadyl Crossbow

Method 1: Obtain the Twisted Buckler from Chambers of Xeric

The primary way to obtain the Twisted Buckler is by completing the Chambers of Xeric raid. This raid is located in Great Kourend at Mount Quidamortem, and it features a series of combat rooms, puzzles, and boss encounters that culminate in a final battle.

Access Requirements

Unlike some other raid content, the Chambers of Xeric does not require specific quests to enter. However, players are strongly encouraged to have high combat stats and strong gear before attempting it.

Recommended requirements include:

·90+ Combat level

·High combat stats in ranged, magic, and melee

·Experience with PvM mechanics

·Reliable food and potions

Raids can be completed either solo or with a team. Most players prefer team raids because they are faster and more forgiving for newer raiders.

How the Chambers of Xeric Drop System Works

The Chambers of Xeric uses a points-based reward system. Each player earns points during the raid based on their performance and contributions.

Factors that influence your drop chances include:

·Total raid points earned

·Individual player contribution

·Team size

·Death count during the raid

At the end of the raid, rewards are generated in a chest. Occasionally, players receive a rare reward known as a “purple chest.” This indicates that a unique raid item has been rolled.

Possible unique drops include:

·Twisted Bow

·Dragon Claws

·Kodai Insignia

·Ancestral armor pieces

·Twisted Buckler

Even if you receive a purple chest, the item you obtain is randomly selected from the raid’s unique drop table. Because of this, getting a Twisted Buckler can take many raids depending on luck.

Tips for Farming the Twisted Buckler Efficiently

If you plan to grind Chambers of Xeric in hopes of receiving the buckler, there are several strategies that can improve your chances.

Join Experienced Teams

Experienced raiding groups tend to complete raids much faster, allowing you to accumulate points and rewards more efficiently.

Avoid Dying During Raids

Deaths significantly reduce your raid points, which lowers your chances of receiving rare rewards.

Focus on High Damage Output

The more damage you contribute during encounters, the higher your personal raid points will be.

Learn Solo Raids (Advanced Option)

Solo raids can be more challenging but offer complete control over raid points. Skilled players sometimes prefer this method for maximizing their drop chances.

Even if you don’t obtain the Twisted Buckler immediately, Chambers of Xeric remains highly profitable. Regular raid rewards can generate substantial amounts of OSRS gold over time.

 Method 2: Buy the Twisted Buckler from the Grand Exchange

For players who prefer a faster route, the Twisted Buckler can also be purchased directly from the Grand Exchange. Since it is a tradeable raid item, many players sell their drops on the market.

However, the shield can be expensive due to its usefulness in endgame PvM.

To afford it, players typically earn OSRS gold through activities such as:

·Boss farming (Vorkath, Zulrah, Hydra)

·High-level Slayer tasks

·Raids

·Grand Exchange flipping

·Skilling for profit

Some players also explore online marketplaces where OSRS items for sale are available. These services can allow players to quickly obtain powerful gear upgrades and save time on long grinding sessions. As always, players should prioritize account safety and remain aware of game policies before considering such options.

Purchasing the Twisted Buckler directly is often the fastest way to incorporate it into your ranged setup.

Why the Twisted Buckler Is So Valuable

The Twisted Buckler stands out because it provides a rare combination of offensive and defensive power for ranged builds.

High-Ranged Accuracy

Its ranged attack bonus significantly increases hit consistency, which directly improves DPS in long boss fights.

Strong Defensive Stats

Unlike many offensive items, the buckler still provides respectable defense against melee, ranged, and magic attacks.

Ideal for Endgame PvM

The Twisted Buckler is frequently used in high-level content, such as:

·Chambers of Xeric

·Theatre of Blood

·Vorkath

·Alchemical Hydra

·High-level Slayer encounters

Compared to other shields like the Odium Ward or Dragonfire Ward, the Twisted Buckler often performs better in situations where maximizing ranged damage is the priority.

Final Thoughts

The Twisted Buckler remains one of the best ranged shields available in Old School RuneScape. With its exceptional ranged attack bonus and balanced defensive stats, it is a staple item for players engaging in endgame PvM.

You can obtain the Twisted Buckler either by completing the Chambers of Xeric and hoping for a rare drop or by purchasing it directly from the Grand Exchange using accumulated OSRS gold. Some players also explore marketplaces offering OSRS items for sale to accelerate their gear progression.

Regardless of the path you choose, the Twisted Buckler is a powerful upgrade that can significantly improve your ranged performance in some of the toughest challenges across Gielinor.

OSRS Giants Foundry Positioning Guide:Refining Your Smithing Flow

For Old School RuneScape players looking to push their Smithing skill to new heights, the Giants Foundry offers a focused, rewarding path unlike any other. Introduced as a dedicated mini-game for mid-to-high-level Smithers, it transforms molten metal into XP and profit through a system that rewards timing, awareness, and strategic positioning.

But maximizing your output at the Foundry isn’t just about having ores and blueprints-it’s about where you stand, how you move, and when you act. This guide breaks down the most effective positioning techniques and timing tactics to help you perfect your rhythm and dominate the Foundry floor.

Located beneath the giants enclave in the city of Anvil Haven, the Foundry tasks you with creating weapons by smelting and refining alloys into molds provided by Kovac. Every step in this loop-from heating and cooling the blade to grinding or polishing-involves interacting with machines that operate on a timed efficiency cycle.

The better your timing and positioning during these steps, the faster and more accurate your progress will be, translating directly into XP and Foundry Reputation points.

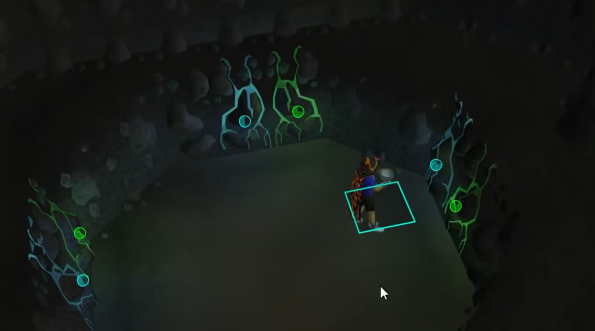
One of the core mechanics in the Giants Foundry is the golden outline that briefly appears around a station during a refinement task (e.g., the trip hammer or the polish wheel). This glow signals a short, roughly 6-second optimal window where your input grants maximum progress per interaction-about 5% or more per click.

Clicking outside this window wastes time, especially if you’re aiming to complete contracts as quickly as possible for higher efficiency rates.Your time is valuable—skip the hassle and buy OSRS gold from RSgoldfast now!

Positioning Tips to Improve Reaction Time and Efficiency

1.Hug the Stations Closely

    Wherever you’re working-whether it’s cooling, grinding, or hammering-always position your character as close to the station as possible. This reduces travel time between steps and ensures you’re ready to act the moment the golden indicator appears.

    Best Practice:Stand on the edge of the station clickable zone but stay visible so you can monitor the glow.

    2.Pre-Click Strategy

      After initiating an action (like placing the sword on the grindstone), hover your cursor over the machine and prepare to click again as soon as the glow appears. This semi-AFK rhythm helps avoid missing the efficiency window and builds muscle memory over time.

      Pro Tip:Use left click to interact hotkeys and avoid misclicks by turning off unnecessary UI elements.

      3.Optimize Your Camera Angle

        Adjust your in-game camera so that all machines are in clear view with minimal overlap from other elements. A top-down or slightly angled view often gives the clearest look at glow timings and helps you switch stations quickly.

        Tip for low-end PCs:Lower graphics settings to ensure you don’t miss the glow due to lag or visual clutter.

        4.Minimize Movement Between Stations

          Before you start refining, plan your route. For example, if your blade will need heating, shaping, and cooling-try to choose a position where all three machines are within a short walking path. Less movement equals more uptime.

          Efficiency Route Example:From the lava pool → trip hammer → water basin → grindstone-form a triangle route that flows naturally.

          5.Avoid Unnecessary Interface Distractions

            During refining, avoid opening your inventory or other menus unless necessary. Even small UI interruptions can distract from the golden window and reduce your output.

            While positioning plays a huge role, other factors can make or break your refining speed:

            Gear Buffs

            Smiths Tunic, Gloves, and Boots:These not only look the part but give small XP boosts that stack up over time.

            Ice Gloves:Reduce the time needed at the cooling station, cutting precious seconds from your loop.

            Blueprint Management

            Always tailor your blueprint to your skill level and material availability. Shorter, easier contracts are better if you’re farming XP; longer, complex ones suit those aiming for Foundry rewards like the Smiths Outfit or the Colossal Blade.

            Resource Stockpiling

            Make sure your inventory is prepped with the right bars before you begin. Having to pause your session to restock breaks your efficiency rhythm and adds unnecessary downtime.Boost your OSRS gaming experience with premium buy RS gold from RSgoldfast! Trust RSgoldfast for unbeatable prices and top-notch service!

            Giants Foundry is more than just a Smithing side hustle-it’s a rhythm-based mini-game where positioning, awareness, and timing define your success. By staying close to your machines, watching for the golden glow, and reducing excess movement, you can forge faster and smarter-not harder.

            With enough practice, you’ll find yourself entering a flow state where each blade is crafted with precision, each XP drop feels earned, and your Smithing levels rise in record time.

            Mmoexp Old School RuneScape: Newest PvM Challenge: Take on the Royal Elemental Titans

            Old School RuneScape (OSRS) continues to evolve its PvM landscape, and the latest update introduces a thrilling new boss encounter: the Royal Elemental Titans, Branda, Queen of Fire, and Eldric, King of Frost. This high-octane two-boss fight is more than a test of brute strength’s a carefully designed teaching encounter focused on improving your gear switching and PvM fundamentals. Whether you’re a seasoned veteran or an intermediate combatant looking to sharpen your skills, the Royal Titans will push your limits in a dynamic and rewarding way.

            The Battle Begins: What to Expect

            The Royal Titans are located in a new arena designed specifically to facilitate learning through combat. Jagex refers to this as a “teaching encounter,” building on lessons introduced in prior bosses such as Scurrius and Perilous Moons. The fight emphasizes gear switching between melee, range, and magic to counter the ever-changing threats posed by these elemental behemoths.

            You’ll face Branda and Eldric simultaneously, each commanding their elemental forces. Branda uses powerful fire-based attacks and summons flame minions, while Eldric brings frost damage and icy summons. Their mechanics require you to adjust your positioning and combat style constantly, reinforcing the need for a reactive and adaptable PvM strategy.

            The recommended minimum combat level is 70+, with a strong emphasis on having solid gear for all three combat styles. Efficient switching between styles is key to exploiting elemental weaknesses, defeating minions quickly, and surviving coordinated elemental barrages.

            Combat Strategy: Gear Up for Success

            Preparation is crucial. While melee is considered the most effective for direct boss damage, range is needed to deal with summoned enemies that attempt to keep their distance, and magic is useful for exploiting specific elemental vulnerabilities. You’ll want to bring gear that allows for smooth and efficient switching-perhaps Barrows gear, Armadyl crossbow, and standard or ancient spellbooks, depending on your setup.

            If you need better gear or consumables like Saradomin brews, Sharks, or Prayer potions, don’t hesitate to use your OSRS gold to purchase them from the Grand Exchange or trusted vendors. Going into this fight under-equipped could be a costly mistake, especially if you’re attempting it solo.

            One important detail is that the fight can be undertaken solo or as a duo. Solo runs are far more challenging but reward you with 100% of the loot. In duos, coordination is key- ideally, both players should master all three combat styles to stay flexible.

            Unique Mechanics: Elemental Mayhem

            Branda and Eldric’s abilities complement and contrast one another in ways that make the battle chaotic but manageable with practice. Firewalls may block paths, while frost zones freeze you in place. Minions can appear and deal chip damage or crowd-control you while the Titans charge up heavy-hitting spells.

            This fight isn’t just about damage-per-second’s a dance of movement, timing, and reaction. The bosses will sometimes separate, forcing players to split up or make a quick decision about which one to prioritize. This can be an excellent teaching moment in target-switching and prioritization, skills that pay dividends in harder raids and future PvM content.

            Loot and Rewards: Choose Wisely

            Once both Titans fall, here comes one of the encounter’s most interesting twists-you can only loot one of the bosses. This introduces a new element of choice and risk management. Each boss drops unique items:

            Twinflame Staff – Assembled using components from both Titans, this staff casts elemental spells automatically based on your target’s weakness, streamlining PvM rotations.

            Giantsoul Amulet – Teleports you directly to this boss fight or other select PvM locations, saving time on travel.

            Desiccated Pages – Likely to be tied to lore or future magic upgrades.

            Mystic Vigour Prayer Scroll – A Branda-exclusive drop that unlocks a powerful new Prayer.

            There’s also a new pet, hidden behind RNG, as always. In an Araxxor-style twist, you can choose to sacrifice your loot at the end of the fight to double your odds of receiving the pet. This makes each run a strategic gamble-do you go for guaranteed value or risk it all for that prestigious drop?

            Why This Boss Matters

            Beyond the loot, the Royal Elemental Titans serve a broader purpose: they teach players to PvM smarter. Jagex has intentionally structured the encounter to introduce players to high-level concepts in a forgiving but challenging environment. There’s no one-hit KO mechanic, no RNG overload, and no excessive grind required just to get a shot at them. It’s accessible, rewarding, and more than anything, fun.

            Additionally, the PvM-focused rewards offer meaningful upgrades for players pursuing bossing as a main goal. The Twinflame Staff, for instance, could become a go-to weapon for boss fights with known elemental weaknesses, saving time and boosting efficiency.

            Final Tips: Prepare Before You Dare

            Bring a familiar with food or healing if available, or bank up high-tier consumables beforehand.

            Use cheap OSRS gold to ensure you’re fully stocked with potions, armor, and backup weapons.

            Practice gear switching in safe zones or other multi-style fights (like Barrows or Pest Control) if you’re not confident.

            If soloing, consider teleport gear like the Giantsoul Amulet to cut down on travel time between attempts.

            Whether you’re in it for the challenge, the loot, or the pet, the Royal Elemental Titans offer one of the most engaging PvM experiences OSRS has seen in recent updates. And with cross-platform play on PC, iOS, and Android, you can grind for that pet or teleport scroll anywhere home or on the go.

            And if you’re looking to gear up fast or stockpile supplies before facing Branda and Eldric, consider securing some OSRS gold through MMOexp. With fast delivery, trusted service, and great deals, MMOexp makes it easy to get what you need and focus on what matters: dominating Gielinor’s toughest new challenge.

            OSRS King Ransom Quest Guide

            Old School RuneScape is known for its engaging quests that immerse players in the lore of Gielinor. King Ransom is a pivotal quest that not only progresses the storyline but also unlocks valuable gameplay mechanics. This guide provides both a quick reference for experienced players and a detailed walkthrough for those who need additional guidance.

            Quick Walkthrough

            Sinclair Mansion Investigation

            1.Speak with Gossip – Find Gossip outside Sinclair Mansion, northwest of Camelot.

            2.Talk to the Guard – Engage with the guard stationed in the mansion’s courtyard.

            3.Enter the Mansion – Gain access by climbing through the broken window on the east side.

            4.Gather Evidence:

            Scrap Paper – Located in the dining room on the first floor.

            Address Sheet – Found in the library on the first floor.

            Black Knight Helmet – Hidden in a bookcase in the library.

            5.Deliver the Evidence – Pass the collected items to the guard through the window.

            6.Return to Gossip – Speak with Gossip again and exhaust all dialogue options.

            Detailed Walkthrough

            Step 1: Start the Quest

            Navigate to Sinclair Mansion, northwest of Camelot, and speak to Gossip. He will provide background information and initiate your investigation into the mysterious events surrounding the mansion.

            Step 2: Speak with the Guard

            After your conversation with Gossip, enter the mansion courtyard and interact with the guard. He is initially suspicious but will eventually provide you with instructions to gather evidence.

            Step 3: Enter the Mansion

            To access the mansion, use the broken window on the east side. Click on it to climb through. Be cautious, as there may be minor threats inside.

            Step 4: Collect Evidence

            Once inside, search for the following items:

            Scrap Paper – Found in the dining room on the first floor.

            Address Sheet – Located in the library on the first floor. Search the bookshelves.

            Black Knight Helmet – Hidden within a bookcase in the library.

            These pieces of evidence are crucial for piecing together the mystery of the mansion.Don’t let gold grinding slow you down – get OSRS gold instantly at unbeatable prices, only at RSgoldfast!

            Step 5: Return the Evidence

            After gathering all necessary evidence, return to the guard and pass the items through the window. This will trigger a cutscene revealing key details about the investigation.

            Step 6: Conclude the Investigation

            Finally, return to Gossip and engage in conversation, selecting all available dialogue options. This will officially conclude this phase of the quest and prepare you for the next steps.

            Additional Tips

            Prepare for Combat – While this segment doesn’t involve combat, later parts of the quest may require you to fight enemies.

            Manage Inventory Space – Ensure you have room to collect all necessary evidence items.

            Check Quest Requirements – Make sure you have met all prerequisites before starting the quest to avoid unnecessary backtracking.

            King’s Ransom offers an exciting mix of exploration, puzzle-solving, and storytelling. By following this guide, you’ll efficiently complete the Sinclair Mansion investigation and advance through the quest seamlessly.Step up your game! With RSgoldfast, earning buy Runescape gold has never been easier. Trust us to deliver quality and fast service so you can focus on conquering Gielinor!

            Making Quick Cash with Ultra Compost in Old School RuneScape

            Old School RuneScape (OSRS) offers a wealth of money-making opportunities, ranging from high-effort, high-reward methods to low-effort, quick cash strategies. For those looking to make some easy OSRS gold without spending too much time or effort, one of the simplest and most effective methods involves crafting Ultra compost. This method requires minimal skill and can be completed in relatively little time, making it a great way to earn cash if you’re just getting started or looking for something to do in between other activities.

            In this guide, we’ll go over exactly how to create Ultra compost, why it’s a great money-making method, and how you can sell it on the Grand Exchange (GE) or use it to improve your own farming efficiency.

            What is Ultra Compost?

            Ultra compost is a type of compost used to improve the growth rate of crops in OSRS farming. It has a higher effectiveness than regular compost or supercompost, providing a greater chance of protecting your crops from disease. This makes it a valuable item for high-level farming players who wish to maximize their yields.

            However, Ultra compost isn’t just useful for your own farming needs—it can also be sold for a decent price on the Grand Exchange. Since creating Ultra compost is a relatively simple process, it presents an excellent money-making opportunity for players who want to make cash with minimal effort.

            The Materials Youll Need

            Creating Ultra compost involves combining three ingredients. Here’s what you’ll need:

            1. Compost: The base ingredient, which is made by using organic materials like bones or the remains of creatures (e.g., fish, meats). Compost is commonly used in farming to help crops grow, and it’s the starting point for Ultra compost.
            2. Salve (Sal) Peter: This can be purchased in bulk from other players or gathered from mining salve deposits found in certain locations. You need three Salve Peter to create Ultra compost, and it acts as a catalyst to turn regular compost into something far more potent.
            3. Volcanic Ash: Volcanic Ash is obtained by using a spade on ash piles found on the Karamja Volcano or purchased from other players. You’ll need two Volcanic Ashes for every batch of Ultra compost you want to make.

            How to Make Ultra Compost

            Making Ultra compost is an incredibly straightforward process, and with just a few steps, you’ll have a stack of Ultra compost ready to sell or use for yourself.

            Step 1: Purchase the Necessary Materials

            You’ll first need to gather all the required materials. The easiest way to do this is by purchasing them from the Grand Exchange. As of writing this guide, the prices for these materials are:

            • Compost: Around 2 coins each.
            • Salve Peter: Approximately 60 coins each.
            • Volcanic Ash: Roughly 1,000 coins each.

            While these prices fluctuate, they give you an estimate of how much you can expect to spend on the materials required for making Ultra compost.

            Step 2: Combine the Ingredients

            Once you have the materials, the process is simple. You’ll need to combine them in the following way:

            1. Go to the compost bin in your player-owned farm (if you have one) or any compost bin on OSRS.
            2. Use the Compost on the Bin to fill it.
            3. Add three Salve Peter to the compost in the bin.
            4. Add two Volcanic Ashes to the mixture.

            Once you’ve combined the ingredients, the compost will turn into Ultra compost. It’s as simple as that.

            Why Make Ultra Compost?

            You might be wondering: why bother making Ultra compost in the first place? The answer lies in its usefulness and value.

            1. Farming Efficiency

            Ultra compost is primarily used to improve farming yields. It has the following benefits:

            • Increased Crop Protection: Ultra compost greatly reduces the chance of crops getting diseased. For players who rely heavily on farming, especially high-level farmers with herb runs, Ultra compost is invaluable. By ensuring that crops don’t become diseased, you can save a significant amount of time and resources.
            • Faster Growth: With its higher effectiveness compared to regular compost or supercompost, Ultra compost speeds up crop growth. This is essential for maximizing farming profitability, particularly when using it on herbs or high-yield crops.

            For those who already have an interest in farming and want to optimize their production, crafting Ultra compost can significantly benefit your farming operations.

            2. Profitable to Sell

            Despite its benefits to your own farming, Ultra compost is just as valuable on the Grand Exchange. The relatively low cost of obtaining the materials and the effort involved in making it ensures that Ultra compost can be sold for a healthy profit.

            Depending on the current market prices, Ultra compost can sell for anywhere between 3,000 to 5,000 coins each. This means that for each batch of compost you make, you could potentially make a profit of several thousand coins with minimal effort.

            Selling Ultra Compost on the Grand Exchange

            Once you’ve crafted a batch of Ultra compost, it’s time to sell it on the Grand Exchange. Before listing your compost, it’s important to check the current market prices, as they can fluctuate based on supply and demand. You’ll want to maximize your profit by selling at a price that is both competitive and profitable.

            1. Visit the Grand Exchange: Head to Varrock and find the GE.
            2. Place Your Offer: You can choose to sell Ultra compost in bulk or individually, depending on the amount you have. Generally, selling in bulk offers better opportunities for faster sales, but you may need to slightly adjust your price to ensure a quick sale.
            3. Wait for the Sale: Ultra compost can take anywhere from a few minutes to several hours to sell, depending on the current demand. If your compost doesn’t sell immediately, you can always adjust the price or try again later.

            By selling Ultra compost regularly, you’ll find that this low-effort money-making method can provide a steady stream of income.

            Other Considerations

            While making and selling Ultra compost is a simple and profitable method, there are a few things to keep in mind:

            • Market Fluctuations: The price of Ultra compost can be volatile, so you’ll need to stay updated on the current prices on the Grand Exchange to ensure you’re maximizing your profits.
            • Alternative Uses: If you prefer to keep your Ultra compost for yourself rather than selling it, it can be a great way to enhance your own farming experience. Whether you’re focusing on herbs, trees, or other crops, Ultra compost will increase your farming output significantly.
            • Time Efficiency: While this method is relatively low-effort, it’s important to keep in mind that you’ll need to gather materials and craft Ultra compost regularly to make the most profit. Although the process itself is simple, the more time you invest, the higher your rewards will be.

            Conclusion

            Creating Ultra compost in Old School RuneScape is one of the easiest ways to make a quick and relatively passive profit. With a low input cost, minimal skill requirements, and a straightforward crafting process, it’s perfect for players looking for low-effort money-making strategies.

            Whether you choose to sell your Ultra compost for quick cash or use it to boost your own farming efficiency, this simple method offers plenty of benefits. Keep an eye on the Grand Exchange to ensure you’re selling at the best possible price, and soon you’ll be raking in the coins while reaping the rewards of your hard (but easy) work!

            Tips and Tricks for Leveling in OSRS (Old School RuneScape)

            Old School RuneScape (OSRS) is a vast and immersive MMORPG that offers players the freedom to level up a wide variety of skills. Whether you’re a new player just starting your journey or a seasoned veteran looking to optimize your progression, leveling in OSRS can sometimes feel daunting. However, with the right strategies and tricks, you can efficiently level up and achieve your goals.

            In this guide, we’ll go over some essential tips and tricks that can help you level up your skills in OSRS faster, more efficiently, and with less frustration. From understanding experience rates to optimizing your training methods, these strategies will help you make the most of your time in the game and level up your character in the most efficient way possible.

            1. Understand the Importance of Experience Per Hour (XP/H)

            One of the most crucial metrics when it comes to leveling in OSRS is the Experience per Hour (XP/H). This refers to the amount of experience you gain in an hour for a given skill. Every skill in OSRS has a variety of training methods, but not all of them are equal in terms of efficiency.

            Tip: Always aim to maximize your XP/H by choosing the best training method for your current level and resources. For instance, you might start training skills using the cheapest methods, but as you level up, you should gradually switch to faster methods, even if they cost more. Here’s a breakdown of how you can use XP/H effectively:

            Monitor XP Rates: Use guides, calculators, or community suggestions to figure out the fastest training methods at your current level. There are many resources online that provide a detailed comparison of methods for all skills.

            Track Your Progress: Pay attention to how much experience you’re getting per hour and adjust accordingly. Some methods might be slower at first but become faster as you improve your gear or unlock better resources.

            2. Make Use of Skill-Boosting Items and Buffs

            Many skills in OSRS can be leveled more efficiently with the use of boosting items, potions, and OSRS gold. These items can temporarily increase your stats or provide experience boosts, making your training more efficient.

            Here are some examples of useful skill-boosting items:

            Skill Lamps: Skill lamps can provide a significant amount of experience in any skill. These are typically earned through quests or specific tasks, and they are incredibly valuable for speeding up your early levels.

            Potion Buffs: Potions like Prayer potions, Antipoison potions, and Energy potions can help you extend your training sessions, making them more efficient.

            Experience-Boosting Gear: Equip gear that boosts your skills or provides a passive experience boost. For instance:

            Ardougne Cloak boosts Agility XP.

            Explorer’s ring helps in reducing the amount of energy used while training.

            The Graceful outfit reduces the stamina drain, allowing you to train Agility or other skills more effectively.

            Tip: Prioritize using these boosts during long training sessions or when completing difficult activities to maximize efficiency.

            3. Train Your Skills with Focused Goals

            In OSRS, trying to level up every skill at once can quickly become overwhelming. The game features a large number of skills, each with their own training methods. Instead of spreading yourself thin, focus on one or two skills at a time and set goals for each one.

            For example:

            Pick a Combat Skill: Combat stats like Attack, Strength, and Defence can be leveled up in tandem with your Slayer skill, which is an excellent way to level up and gain rewards simultaneously. These skills will naturally progress while completing tasks and defeating monsters.

            Set Milestones: Breaking your skill leveling into smaller, more manageable milestones helps you stay focused. For example, you can aim for reaching level 30 in Woodcutting or 50 in Fishing before moving on to other skills.

            Prioritize Quests: Completing quests that provide experience rewards can be an efficient way to level up early on. Many quests give significant experience in skills like Mining, Smithing, or Herblore, allowing you to quickly gain experience while progressing through the game.

            Tip: Focus on Skilling Activities That Complement Each Other—many players level up Mining and Smithing simultaneously or Fishing and Cooking, so you get the benefits of training both skills at once.

            4. Use Efficient Training Locations

            Efficient training locations play a significant role in leveling your skills faster. By choosing training locations that give high XP rates and require less time spent traveling or gathering materials, you’ll significantly increase your efficiency.

            Fishing: For high-level Fishing, you should aim for locations like Shilo Village for Sharks or Cavefish, which provide great XP rates and are accessible for more advanced players.

            Woodcutting: As you level up, Ape Atoll (for Tropical Wodcutting) offers fast XP rates. Additionally, the Sawmill and the Woodcutting Guild provide further XP boosts.

            Tip: Using tools like teleportation or high-level transportation spells in your spellbook can greatly increase efficiency. For example, the House Teleport or Lunar Spellbook teleports can save time and keep you closer to your training areas.

            5. Optimize Your Time with AFK Training Methods

            AFK (Away from Keyboard) training methods are fantastic for players who want to gain experience in certain skills while doing other things or while they’re not actively playing. These methods let you accumulate XP even when you’re not constantly focused on the game.

            Woodcutting: The Ape Atoll or Sawmill area allows for AFK training, as your character will continue to chop down trees or perform other activities while you’re not actively engaged.

            Fishing: Training at spots like Catherby or Barbarian Fishing is another great way to level up with minimal attention. These methods let you gather resources passively while engaging in other activities.

            Thieving: Training in the Pyramid Plunder minigame can also be AFK-optimized if you set it up correctly, allowing you to level up without requiring constant attention.

            Tip: While AFK training is convenient, be mindful of the time you spend away from the game. Sometimes, a more active training method may provide higher XP rates in the long run.

            6. Utilize the Best Training Methods for Each Skill

            Each skill in OSRS has its own set of optimal training methods. To maximize your efficiency, take the time to research and choose the best methods for each skill as you progress.

            For example:

            Mining: Early on, mining ores like Copper and Tin are your best options. But as you progress, Iron or Rune ores will provide the best XP.

            Crafting: Start with Leather crafting but later transition to Cutting Gems or Crafting amulets for higher XP rates.

            Herblore: You can make potions like Prayer potions or Super restore potions, depending on your level and budget.

            Tip: Always double-check community guides or calculators for up-to-date training methods that are proven to provide the best XP rates for your current level.

            7. Focus on Money-Making and Training Simultaneously

            Leveling up your skills in OSRS often requires significant resources. Luckily, there are ways to make cheap RuneScape gold while training certain skills, allowing you to progress without draining your bank account.

            Slayer: This skill is an excellent way to make money while training combat. The loot drops from Slayer monsters can help fund your training for other skills.

            Fishing and Cooking: Catching and cooking fish like Sharks, Anglerfish, and Manta Rays is profitable and a good method to level both skills while making money.

            Woodcutting: Cutting Yew or Magical Trees gives you valuable logs, which can be sold for a considerable amount of profit.

            Tip: Choose methods that allow you to sell items for profit, allowing you to fund your other training or even purchase items like potions and gear to aid your leveling.

            8. Join a Clan or Community

            Being part of a clan or an active community can significantly improve your leveling experience in OSRS. Clans provide social interaction, support, and sometimes even guidance on the best ways to level up efficiently.

            Tip: Many clans or community groups organize events like skill competitions or bossing sessions, where you can level up or make money in a more enjoyable, social environment.

            Conclusion

            Leveling up in Old School RuneScape (OSRS) is a rewarding and engaging experience, but it requires patience and strategic planning. By using the right methods, tools, and optimizations, you can efficiently level up your skills and progress through the game.

            Whether you’re focusing on maximizing XP rates, utilizing AFK methods, or working on multiple skills simultaneously, these tips and tricks will help you level up faster and enjoy the game more. Ultimately, the key to success in OSRS is setting clear goals, staying efficient, and optimizing your training methods to suit your playstyle.

            By following these tips and staying committed to your goals, you’ll be well on your way to mastering OSRS and achieving the status of a top-tier player in no time!

            Old School RuneScape: Smithing 1-99 Leveling Guide

            Smithing is one of the core skills in OSRS gold that allows players to create a variety of metal items, such as weapons, armor, and tools. It’s a highly versatile skill that complements Mining and can be a significant source of profit when trained effectively. Whether you’re a free-to-play (F2P) or a member, leveling Smithing from 1 to 99 is a rewarding journey that opens up many opportunities in the game.

            This comprehensive guide will cover everything you need to know about training Smithing, including efficient methods, profitable strategies, and alternative approaches to suit different playstyles and budgets.

            Understanding Smithing

            Smithing involves smelting ores into metal bars and forging those bars into items using anvils. Players use furnaces to smelt ores and anvils to smith items. Here are a few key things to understand about the skill:

            Experience Points (XP): XP is earned by smelting ores into bars and smithing bars into items. Different materials and items provide varying amounts of XP.

            Primary Materials: You’ll primarily use ores like iron, coal, mithril, adamantite, and runite, along with secondary materials such as gems for crafting jewelry (members only).

            Smithing Tools: A hammer is required for smithing items on an anvil. Ensure you always have one in your inventory while training.

            F2P vs. Members Training

            Free-to-play players have access to fewer materials and training options compared to members. However, F2P players can still train Smithing efficiently up to level 99 using specific methods like cannonballs or gold bars.

            For members, Smithing training options are far more diverse and include higher-level bars and items, Blast Furnace efficiency, and crafting gold items with Goldsmithing Gauntlets for increased XP rates.

            Smithing 1-99 Leveling Guide

            Levels 1-15: Bronze Bars and Items

            Method: Smelt bronze bars and smith them into bronze items.

            XP Rates: ~5-10K XP per hour.

            Materials Needed:

            1 Tin Ore and 1 Copper Ore per bronze bar.

            Use these bars to smith daggers, swords, or other low-level items.

            Tips: Focus on smelting and smithing for consistent XP. Bronze items are generally not profitable, so prioritize XP over income during these levels.

            Levels 15-30: Iron Bars and Items

            Method: Smelt iron ores into iron bars or use the anvil to smith items like iron platebodies.

            XP Rates: ~10-20K XP per hour.

            Materials Needed:

            Iron ore.

            A 50% chance of success unless using the Ring of Forging (F2P and members).

            Tips: If you’re a member, using the Blast Furnace can significantly improve efficiency by reducing coal requirements for higher-level bars.

            Levels 30-40: Steel Bars and Items

            Method: Smelt steel bars and smith them into items like steel platebodies.

            XP Rates: ~20-35K XP per hour.

            Materials Needed:

            1 Iron Ore and 2 Coal per steel bar.

            Profitability: Steel bars and items can be sold for a decent profit in the Grand Exchange (GE), making this an excellent option for F2P players.

            Levels 40-50: Gold Bars (Members Only)

            Method: Smelt gold ore into gold bars using a furnace.

            XP Rates: ~50-70K XP per hour with Goldsmithing Gauntlets.

            Materials Needed:

            Gold ore (available in the GE or mined).

            Tips: Goldsmithing Gauntlets are essential for maximizing XP gains. These are obtained by completing the Family Crest quest.

            Mid-Level Smithing Training (50-70)

            Blast Furnace Training (Members Only)

            Method: Use the Blast Furnace to smelt bars with reduced coal requirements.

            XP Rates:

            ~70K XP per hour (Steel Bars).

            ~90-120K XP per hour (Mithril or Adamantite Bars).

            Materials Needed:

            Coal and ores (iron, mithril, or adamantite).

            Tips:

            The Blast Furnace is located in Keldagrim and requires a fee to access.

            Use stamina potions and Ice Gloves for maximum efficiency.

            Cannonballs (Alternative, Members Only)

            Method: Smelt steel bars into cannonballs.

            XP Rates: ~10-15K XP per hour.

            Profitability: Extremely profitable but very slow XP rates.

            Materials Needed:

            Steel bars and a cannonball mold.

            Tips: This is a low-effort, AFK-friendly method for passive Smithing XP and profit.

            Superheating (Members Only)

            Method: Cast the Superheat Item spell to smelt ores into bars.

            XP Rates: ~50-80K XP per hour.

            Materials Needed:

            Nature runes and ores (iron or steel).

            Tips: This method combines Smithing XP with Magic XP, making it ideal for hybrid training.

            High-Level Smithing Training (70-99)

            Levels 70-85: Mithril Bars and Items

            Method: Smelt mithril bars and smith them into items like mithril platebodies.

            XP Rates: ~100-150K XP per hour.

            Materials Needed:

            Mithril ore and 4 coal per mithril bar.

            Profitability: Mithril items are moderately profitable.

            Tips: Use the Blast Furnace to reduce coal requirements and improve XP rates.

            Levels 85-99: Rune Bars and Platebodies

            Method: Smelt rune bars and smith them into rune items like platebodies.

            XP Rates: ~200K XP per hour.

            Materials Needed:

            Runite ore and coal.

            Profitability: Rune items can yield high profits, especially if sold at the GE.

            Tips: Rune bars are expensive to make, so ensure you have enough starting capital or switch to other methods like gold bars if budget-constrained.

            Alternative: Gold Bars (Members Only)

            Method: Continue smelting gold bars with Goldsmithing Gauntlets.

            XP Rates: ~150K XP per hour.

            Profitability: Gold bars are less profitable but offer consistent and fast XP.

            Tips for Efficient Smithing Training

            Use the Blast Furnace: This mini-game reduces coal requirements and speeds up the smelting process. It’s the most efficient way to train Smithing for members.

            Plan Your Budget: High-level Smithing training can be expensive. Use profitable methods like steel bars or cannonballs to offset costs.

            Quest Rewards: Complete quests that provide Smithing XP, such as:

            The Knight’s Sword (29-37 Smithing boost for low-level players).

            Family Crest (unlocks Goldsmithing Gauntlets).

            Between a Rock… (Smithing XP and mining access).

            Banking and Inventory Management: Optimize your inventory to reduce downtime between trips to the bank and the furnace or anvil.

            Stay Updated on Prices: The GE prices for ores, bars, and items fluctuate. Monitor prices to maximize profits.

            Profitable Smithing Methods

            Cannonballs: Slow XP but great profit.

            Rune Bars and Platebodies: High profits for players with a large starting capital.

            Steel Bars: Consistently profitable, even in F2P.

            Conclusion

            Reaching 99 Smithing in cheap RuneScape gold is a significant achievement that requires dedication and planning. Whether you’re looking to train efficiently for fast XP or prefer slower, profitable methods, there’s a path for every player. By following this guide, you’ll maximize your Smithing potential and unlock the skill’s true benefits. Prepare your materials, head to the furnace or anvil, and start hammering your way to level 99 Smithing!

            Mastering the Art of Risk-Free Flipping in Old School RuneScape (OSRS)

            In Old School RuneScape (OSRS), flipping items on the Grand Exchange (GE) can be a lucrative way to make a steady stream of OSRS Gold, but many players shy away from it. They fear market crashes, price volatility, or the time required to constantly monitor prices. However, flipping doesn’t have to be risky or time-consuming. With the right strategy, you can make a consistent profit with minimal risk. This article will guide you through the process of risk-free flipping using specific items that rarely change in price and offer reliable returns.

            Why Risk-Free Flipping Works

            The concept of risk-free flipping revolves around buying items that are priced close to their alch value. Alching, or using the High Alchemy spell, converts items into coins based on a fixed value. Items with a price near their alch value are less likely to crash because they have a built-in price floor. This stability makes them ideal candidates for risk-free flipping.

            Key Items for Risk-Free Flipping

            1. Dragon Items: Items like Dragon longswords and Dragon platelegs often hover around their alch value, making them solid choices for flipping.
            2. Rune Items: Rune Mystic items, such as the Rune Mystic robe top, are also typically stable.
            3. Black and Blue Dragonhide Bodies: These items usually have a price close to their alch value and offer good flipping opportunities.

            Step-by-Step Guide to Risk-Free Flipping

            1. Research and Selection

            • Identify Stable Items: Choose items whose prices are close to their alch value. Check the GE tracker sites to view historical price trends.
            • Compare Prices: Look for items that are priced 600 to 800 GP below their high alch value for buying. For selling, aim to list them 300 GP below their high alch price.

            2. Purchase Items

            • Buy Limit: Each item has a maximum buy limit every 4 hours. Use this to your advantage by purchasing the maximum allowable amount.
            • Price Setting: Set your buy price slightly below the market price to ensure quicker purchases. For instance, if the Dragon longsword’s buy price is around 59,200 to 59,300 GP, you might want to buy at 59,000 GP for quicker acquisition.

            3. Selling Strategy

            • Sell Price: Set your sell price to approximately 300 GP below the high alch value. For example, if an item’s high alch value is 60,000 GP, consider selling it for around 59,700 GP.
            • Monitor Prices: Occasionally, prices will spike. Use price graphs from GE trackers to identify these opportunities. Adjust your selling price accordingly to maximize profits.

            4. Managing Inventory and Cash Flow

            • Use Multiple GE Slots: To maximize profits, diversify your investments across different items. This ensures that you are not relying on a single item’s performance.
            • Reinvestment: Once items sell, reinvest the profits into new flips to keep the cycle going.

            Example of a Successful Flip

            Here’s a practical example based on recent flipping activities:

            • Items Flipped:
              • Black Dragonhide Body: Purchased for 7,402 GP (alch value 8,088 GP). Sold for 4.37 million GP, making a 300,000 GP profit.
              • Mystic Top: Bought for 71,502 GP (alch value 72,000 GP). Sold for 27.83 million GP, generating a 660,000 GP profit.
              • Dragon Longsword: Acquired for 59,000 GP (alch value 60,000 GP). Sold for 24.94 million GP, achieving a 160,000 GP profit.
              • Blue Dragonhide Body: Purchased for 4,802 GP (alch value 5,000 GP). Sold for 220,000 GP profit.

            These flips demonstrate how, with careful selection and strategy, you can generate substantial profits from risk-free flipping.

            Advanced Techniques for Maximizing Profits

            1. Use GE Tracker Tools

            • Price Trends: Regularly check GE tracker tools to monitor price fluctuations and identify potential spikes.
            • Historical Data: Review historical price data to anticipate future trends and adjust your flipping strategy accordingly.

            2. Diversify Your Portfolio

            • Different Items: Avoid putting all your GP into one item. Diversify your investments to mitigate risks and increase the chances of steady returns.
            • Various Price Ranges: Invest in items across different price ranges to balance out fluctuations and maximize overall profitability.

            3. Adjust to Market Changes

            • Market Trends: Stay updated with in-game events and updates that might affect item prices. Adapt your flipping strategy to align with these changes.

            4. Experiment with Other Items

            • New Opportunities: Regularly explore new items and update your flipping strategy. Some items might become more profitable due to changes in demand or supply.

            Conclusion

            Risk-free flipping in OSRS is a viable strategy for consistent GP accumulation. By focusing on items priced near their alch value and leveraging GE tools for price tracking, you can minimize risk and maximize profit. Diversify your investments, keep an eye on market trends, and adjust your strategies as needed. With these techniques, you can turn spare GP and GE slots into a steady stream of income, enhancing your OSRS experience and financial success in the game.

            Keep up to date with RSorder.com channels for the latest gaming and Old School RuneScape content! You can also enjoy buying Runescape gold service here.

            The Best Melee Gear Guide in OSRS

            Mastering melee combat in Old School RuneScape (OSRS) is vital for overcoming tough adversaries, completing quests, and dominating player-versus-player confrontations. To excel in combat, it’s crucial to equip yourself with the game’s finest melee gear. This comprehensive guide will assist you in identifying top-tier melee gear to maximize combat efficiency, survivability, and unlock new opportunities.

            Selecting the appropriate melee gear is pivotal for enhancing your combat effectiveness. Whether you’re confronting dragons, engaging in PvP battles, or challenging powerful boss monsters, high-quality armor and weapons can significantly impact your performance. These gears not only augment your offensive and defensive capabilities but also provide valuable stat bonuses that can tip the scales of battle in your favor.

            In OSRS, melee gear isn’t solely about sheer power; precision and speed are equally paramount. Certain weapons, like the Abyssal Whip, offer incredible attack speed, enabling you to strike enemies rapidly and accurately. These weapons are essential for maximizing your damage output and swiftly dispatching foes.

            While offense is crucial, defense plays a vital role in ensuring your survival. The best melee gear often boasts high defensive stats that diminish the damage you receive from enemy attacks. This becomes especially valuable when facing formidable opponents, as it allows you to engage in prolonged battles without depleting your health and resources.

            Investing in top-tier melee gear can also prove cost-effective. Superior armor and weapons are more durable and require fewer repairs, saving you valuable OSRS gold. You can then allocate these savings towards other aspects of your character’s development, such as training other combat skills or acquiring valuable items. Alternatively, you can choose to buy RuneScape gold from RSOrder.

            Equipping the best melee gear unlocks new opportunities for your character. As your combat capabilities improve, you gain access to higher-level content, including challenging bosses, elite quests, and formidable player-versus-environment encounters. These activities often yield valuable rewards and open doors to new adventures that would otherwise remain inaccessible with inferior gear.

            For players focused on player-versus-player combat, the best melee gear is indispensable. It not only enhances your combat performance but also grants you an advantage over opponents who may have not invested as heavily in their gear. With the right equipment, you can ascend to the top ranks of the OSRS PvP community and earn prestigious rewards for your accomplishments.

            Powered by WordPress & Theme by Anders Norén