


Category: Call of Duty: Black Ops 7

Call of Duty:Black Ops 7 Zombies – Top Weapon Loadout for Cursed Ashes

Ashes of the Damned is one of the most challenging Zombies maps in Call of Duty:Black Ops 7. Whether you’re aiming to complete the full Easter egg, survive the final boss, or push into high rounds, choosing the right loadout is crucial for success.

The M15 MOD 0 assault rifle is the standout primary weapon for this map. It’s easy to handle, scales well into later rounds, and supports a vital attachment required for the boss fight.

The M335-X Cloak Underbarrel lets you fire smoke grenades. These are critical during the boss encounter when repairing Ol’ Tessie, as they conceal you from zombies and provide space to survive explosions and heavy crowd pressure.Get ahead before it counts. MMOexp CoD Black Ops 7 Bot Lobbies help you build consistency, confidence, and skill—so you’re ready when the real matches begin.

Recommended Attachments

For maximum effectiveness, equip the following on the M15 MOD 0:

Monolith Suppressor (Muzzle):Improves bullet velocity, damage range, and grants extra salvage on kills.

16.5” Fusion Barrel:Further boosts range and bullet velocity.

M335-X Cloak (Underbarrel):Provides smoke cover for repairs.

Backline Flip Mags:Speeds up reloads for continuous fire.

Hexcut Grip:Enhances ADS, slide-to-fire, dive-to-fire, and jump ADS speeds.

Telescopic Stock:Increases movement, strafing, and hipfire mobility.

5.56 NATO Overpressured:Increases bullet velocity.

Secondary Weapon:The Necrofluid Gauntlet is essential. It delivers high damage, drains health from enemies, and trivializes most encounters outside the boss arena. During the boss fight, leave Ol’ Tessie only briefly if explosions force repositioning.

Best GobbleGums

GobbleGums aren’t required, but they significantly improve survivability and make difficult runs easier.

Recommended GobbleGums

Perkaholic:Grants all perks instantly.

Near Death Experience:Revives players nearby while keeping perks.

Power Keg:Activates a Full Power power-up.

Shields Up:Fully restores armor and doubles its durability.

Gift Card:Gives 30,000 Essence—ideal for Round 1 to open doors, early Pack-a-Punch tiers, and quickly progress Easter egg steps.

Boss Fight Strategy

Solo:Power Keg, Shields Up, Perkaholic

Co-op:Power Keg, Shields Up, Near Death Experience

Essential Perks and Augments

The following perks are critical for survival and Easter egg completion:

Jugger-Nog:Boosts health.

Quick Revive:Faster healing and revives.

Speed Cola:Increases reload speed and improves armor application.

Stamin-Up:Enhances movement speed.

Melee Macchiato:Increases melee damage.

Recommended Perk Augments

Jugger-Nog (Iron Core, Durable Plates):Extra health when armor breaks and increased armor durability.

Quick Revive (Dying Wish, Karmic Return):Grants temporary invulnerability and full heal on revive.

Tip:Dying Wish can save your run by preventing death, even if it consumes Quick Revive, keeping all other perks active.

Equipment Recommendations

Tactical:Cymbal Monkey

Unlocks at Level 24

Costs 1,000 Salvage

Carry two at once

Recharges with Max Ammo

Cymbal Monkeys are excellent for distracting zombies during repairs or surviving laser-heavy boss mechanics. While slower than the Kazimir, their recharge synergy and accessibility make them the superior choice for Ashes of the Damned.

Lethals and Scorestreaks:Generally optional. The Combat Axe is only needed for a side Easter egg at Reba’s Diner (Exit 115).

Field Upgrades

Best Choice:Aether Shroud

Aether Shroud is mandatory. When active, all enemies—including elites and bosses—ignore you completely.

Recommended Augments

Extra Charge:Grants a second Shroud charge.

Group Shroud (Co-op):Cloaks nearby allies.

Burst Dash (Solo):Short-range warp that kills standard enemies.

Extension (Extra Slot):Significantly extends Shroud duration.

Two Shroud charges during the boss fight can be the difference between success and failure.

Ashes of the Damned is punishing, but with this setup, it becomes far more manageable. This loadout prioritizes:

Survivability

Boss fight efficiency

Consistent Easter egg progression

Many players practice strategies in buy Black Ops 7 Bot Lobbies, which allow them to refine movement, weapon handling, perks, and GobbleGums without risking a full run. Some even invest in private bot lobbies to perfect setups before attempting full Easter egg runs or boss fights.
Black Ops 7 Zombies:Best Guns and Loadout Strategy for Cursed Ashes

Ashes of the Damned is one of the most intense and mechanically demanding Zombies experiences in Call of Duty:Black Ops 7. Whether you’re attempting the full Easter egg, preparing for the brutal final boss fight, or simply trying to survive higher rounds consistently, your loadout matters more here than on almost any other map.

Best Weapon for Ashes of the Damned

Our primary weapon recommendation is the M15 MOD 0, the first Assault Rifle unlocked in BO7. It’s beginner-friendly, scales extremely well into late rounds, and-most importantly-has access to a critical attachment needed for the boss fight.

Why the M15 MOD 0 Is the Best Choice

The standout attachment here is the M335-X Cloak Underbarrel, which allows you to fire smoke grenades. These smokes are essential during the boss fight when repairing Ol’ Tessie, as they cloak you from zombies and give you the breathing room needed to survive inevitable explosions.

Best Attachments Explained

Monolith Suppressor (Muzzle):Grants extra salvage on kills and boosts bullet velocity and damage range

16.5” Fusion Barrel:Further improves damage range and bullet velocity

M335-X Cloak (Underbarrel):Fires smoke grenades to hide from zombies during repairs

Backline Flip Mags:Faster reloads for constant sustained fire

Hexcut Grip:Improves ADS, slide-to-fire, dive-to-fire, and jump ADS speeds

Telescopic Stock:Boosts movement, strafing, and hipfire mobility

5.56 NATO Overpressured:Increases bullet velocity

Alongside your primary weapon, you should always carry the Necrofluid Gauntlet. It deals massive damage, siphons health, and trivializes most encounters outside the boss arena. During the boss fight, you should only leave Ol’ Tessie when it explodes-and even then, only briefly.

Best GobbleGums for Ashes of the Damned

GobbleGums aren’t mandatory, but they can dramatically reduce difficulty and save failed runs.

Recommended GobbleGums:

Perkaholic:Instantly grants all perks

Near Death Experience:Revive by proximity; revived players keep perks

Power Keg:Activates a Full Power power-up

Shields Up:Fully refills armor and doubles armor strength

Gift Card:Grants 30,000 Essence

Gift Card is best used on Round 1, allowing you to open all doors, buy early Pack-a-Punch tiers, and rush Easter egg steps before zombie scaling becomes punishing.

For the boss fight:

Solo:Power Keg, Shields Up, Perkaholic

Co-op:Power Keg, Shields Up, Near Death Experience

Best Perks and Augments for Ashes of the Damned

While every perk has value, these five are essential for both the Easter egg and boss fight:

Jugger-Nog – Increased health

Quick Revive – Faster healing and revives

Speed Cola – Faster reloads and armor application

Stamin-Up – Increased movement speed

Melee Macchiato – Boosted melee damage

Best Augments to Use:

Jugger-Nog(Iron Core, Durable Plates):Increases HP when armor breaks and boosts armor durability

Quick Revive(Dying Wish, Karmic Return):Grants temporary invulnerability to lethal damage and full heal on revives

Dying Wish is especially powerful. Even though it consumes Quick Revive, it saves your run by preventing death and keeping all other perks active.

Best Equipment in Ashes of the Damned

Your tactical equipment can make or break boss phases and tight Easter egg steps.

Cymbal Monkey (Best Tactical Choice)

Unlocks at Level 24
Costs 1,000 Salvage
Can carry two at once
Recharges with Max Ammo

Cymbal Monkeys are perfect for distracting zombies while repairing Ol’ Tessie or surviving laser-heavy boss phases. While slower than the Kazimir, their accessibility and recharge synergy make them the best option here.

Lethals and Scorestreaks are mostly irrelevant, though the Combat Axe is required for a side Easter egg (a free one spawns at Reba’s Diner at Exit 115).

Best Field Upgrade and Augments

Aether Shroud (Best Overall Field Upgrade)

Aether Shroud is mandatory for Ashes of the Damned. While active, all enemies-including elites and bosses-ignore you entirely.

Best Augments:

Extra Charge:Grants an additional Aether Shroud charge

Group Shroud (Co-op):Cloaks nearby allies

Burst Dash (Solo):Short-range warp that kills normal enemies

Extension (Extra Slot):Significantly increases Shroud duration

Two Aether Shroud charges during the boss fight can single-handedly secure success.

Ashes of the Damned is unforgiving, but with the right setup, it becomes far more manageable. This loadout is optimized for survivability, boss mechanics, and Easter egg consistency.

Players practicing Zombies mechanics or challenge setups often warm up in CoD Black Ops 7 Bot Lobbies, which can help refine movement, weapon handling, and perk synergy without pressure. Some players even choose to buy Black Ops 7 Bot Lobbies to practice high-level strategies before committing to full Easter egg runs.

Black Ops 7 Zombies Ashes of the Damned – How to Unlock the Ray Gun Mk2 for Free

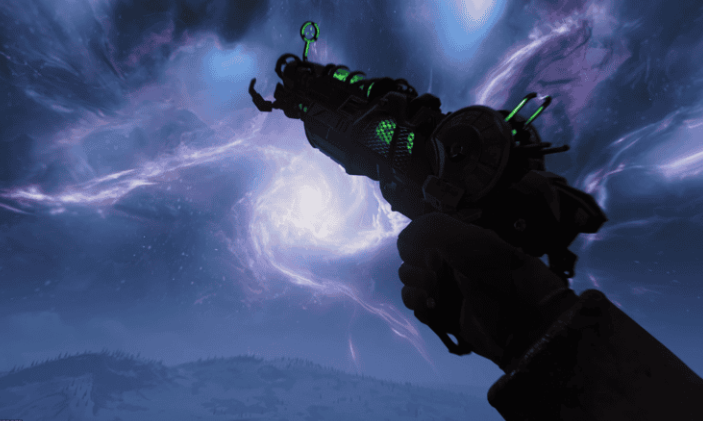
Ashes of the Damned is one of the largest and most mechanically dense Zombies maps Treyarch has ever released for Call of Duty: Black Ops 7. Packed with verticality, branching routes, and a complex Jump Pad network, the map can feel overwhelming at first. Fortunately, one of the most iconic Wonder Weapons in Zombies history-the Ray Gun Mk2-can be unlocked completely free through a repeatable Easter Egg.

This guide walks you through every step of the Ashes of the Damned Free Ray Gun Mk2 Easter Egg, including how the Jump Pad puzzle works, how to read the blinking light sequence, and how to guarantee consistent success every match.

How to Get the Free Ray Gun Mk2 in Ashes of the Damned (BO7 Zombies)

This Easter Egg is centered around Ashes of the Damned’s interconnected Jump Pad system and a randomized flashing light code. While it may seem complicated at first, once you understand the logic, you’ll be able to complete it quickly-even more efficiently if you’re practicing routes or farming XP in CoD Black Ops 7 Bot Lobbies.

Step 1 – Turn On the Power and Unlock the Map

Before starting the Easter Egg, you must complete the basic setup:

·Turn on the main power

·Unlock all major map areas connected by Jump Pads

·Have at least 4,000 Essence

Once the map is fully open, the Jump Pad puzzle becomes available.

Step 2 – Complete a Full Jump Pad Loop

There are eight Jump Pads on Ashes of the Damned. Your first objective is to use all eight Jump Pads in a single continuous loop, starting and ending at the same location.

Important notes:

·Your starting Jump Pad does not matter

·The order does not matter for this first loop

·Each Jump Pad costs 500 Essence (4,000 total)

Example Jump Pad Loop

·Blackwater Lake

·Ashwood

·Exit 115

·Zarya Cosmodrome

·Ashwood

·Vandorn Farm

·Janus Towers Plaza

·Back to Blackwater Lake

As long as all eight are used in one cycle, the step will register as complete.

Step 3 – Survive Four Rounds

After completing the initial Jump Pad loop, simply survive four full rounds. There is nothing to activate or interact with during this time. Once the fourth round ends, the next step becomes available.

Step 4 – Read the Blinking Light Sequence

Travel to Janus Towers Plaza and look toward the north-facing lights in the main lobby. The leftmost light will begin flashing in a randomized sequence.

Here’s how it works:

1. Count the number of flashes

2. Wait for the pause

3. Count the next set of flashes

4. Continue until the light stays solid

The sequence ranges from 1 to 7 flashes per number and will loop if you miss it.

Example Sequence

3 → 6 → 5 → 7 → 4 → 1 → 2

Each number corresponds to a specific Jump Pad location.

Step 5 – Match Numbers to Jump Pads

Use the table below to translate your blinking sequence into a Jump Pad order:

·1 – Janus Towers Plaza

·2 – Vandorn Farm

·3 – Ashwood (Market Square → Exit 115 / Zarya)

·4 – Blackwater Lake

·5 – Exit 115

·6 – Zarya Cosmodrome

·7 – Ashwood (Rabbit Alley → Vandorn Farm / Blackwater Lake)

Using the example sequence (3, 6, 5, 7, 4, 1, 2), the correct Jump Pad path would be:

·Ashwood (Market Square)

·Zarya Cosmodrome

·Exit 115

·Ashwood (Rabbit Alley)

·Blackwater Lake

·Janus Towers Plaza

·Vandorn Farm

Important: You must follow the sequence exactly. Using a Jump Pad out of order will fail the Easter Egg and force a restart in a new match.

Step 6 – Enter the Purple Portal

After completing your assigned Jump Pad sequence, take one final Jump Pad back to Ashwood from your current location. This completes the loop.

Now, look up.

A purple portal will appear floating between two Jump Pad routes. Its location is random each match, such as:

·Vandorn Farm → Janus Towers

·Janus Towers → Ashwood

·Ashwood → Blackwater Lake

Use the correct Jump Pad to launch yourself directly into the portal. If successful, you’ll be teleported instantly to Ashwood.

Step 7 – Claim the Free Ray Gun Mk2

Upon landing in Ashwood, a rift opens and releases:

·Dead zombie bodies

·Essence piles

·Bonus Points

·Possible Mystery Perks

And most importantly:

·A free Ray Gun Mk2

While the Ray Gun Mk2 can appear before Round 15, players report far more consistent results after Round 15. If you want guaranteed reliability-especially when practicing routes or buying Call of Duty Black Ops 7 Bot Lobbies-it’s best to wait.

Final Tips and Warnings

·Never use a Jump Pad out of order.

·The initial 8-pad loop only needs to be done once per match.

·The blinking sequence is randomized every game.

·The Ray Gun Mk2 Easter Egg is repeatable every match.

·Works in co-op, but all players must follow the sequence correctly.

Final Thoughts

Unlocking the free Ray Gun Mk2 in Ashes of the Damned is one of the most rewarding and repeatable Easter Eggs in Black Ops 7 Zombies. Once mastered, it takes only a few minutes to complete and gives you one of the strongest Wonder Weapons in the game-dramatically improving survivability from mid-game into ultra-high rounds.

Powered by WordPress & Theme by Anders Norén